Anatomy of a DOOM Level: Part 2 - Creating a DOOM Level
In this section we are going to go through the process of building a new DOOM level for the DOOM engine using some modern tools like Doom Builder and modern engine remakes like GZDOOM.
This is where the fun kicks in for understanding all of the great mechanics we can pull from our level data we defined in part 1 on understanding the WAD structure of a DOOM level.
The HEXADEATHIMAL Map
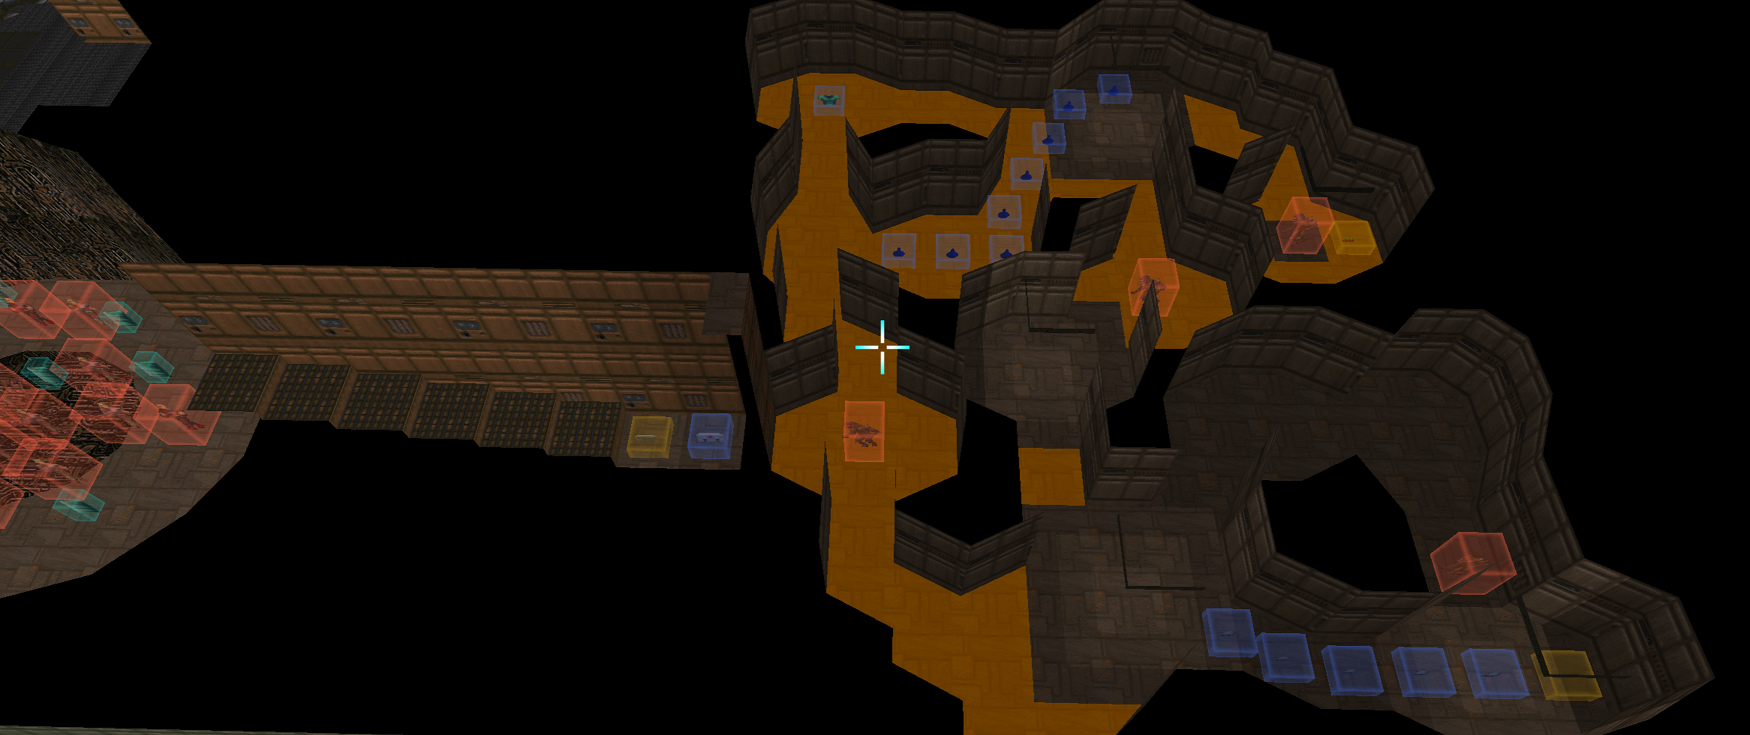
Like most things, I set out to learn how to do something and wound up with something significantly more involved than I had planned. Creating my HEXADEATHIMAL map was a very informative and rewarding task and I will continue to dabble in Map making in the future. This Map build features all the major components of a DOOM II level with some embellishments that came from ACS Scripting (part of Ravensoft's contribution to the engine) and running in the great GZDOOM or Zandronum engine ports.
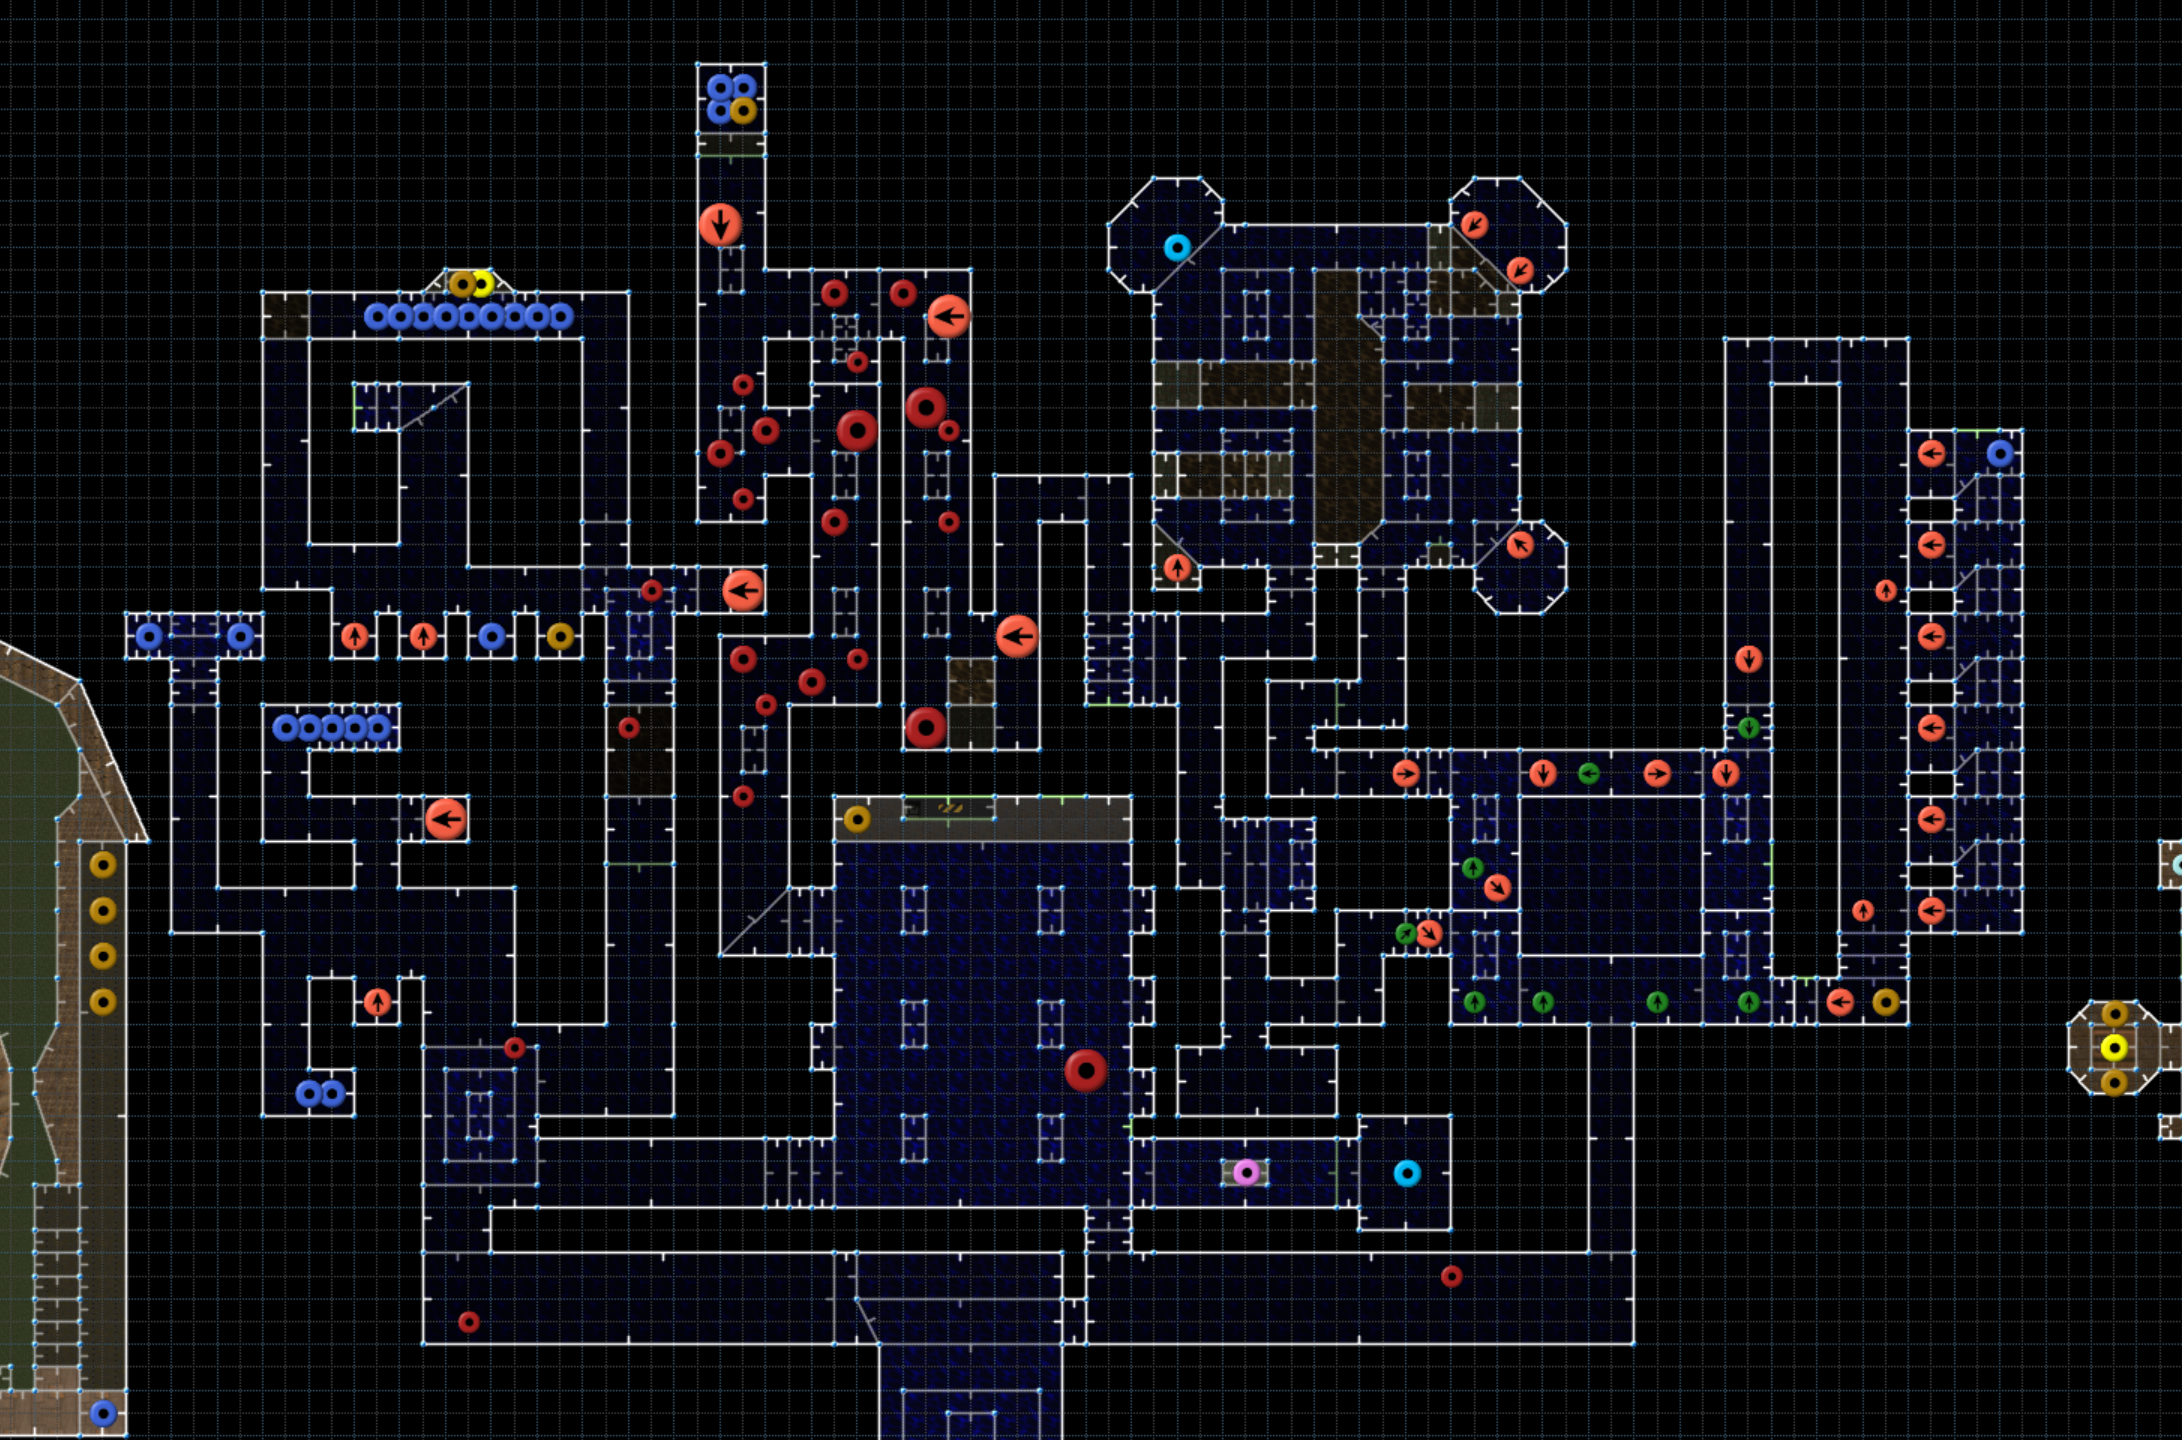
This map is big. So big in fact that even with me knowing every detail of this map it took a solid 20 minutes to beat it as a demonstration for this content. You can view the HEXADEATHIMAL playthrough on YouTube.
DOOM HEXADEATHIMAL Map Playthrough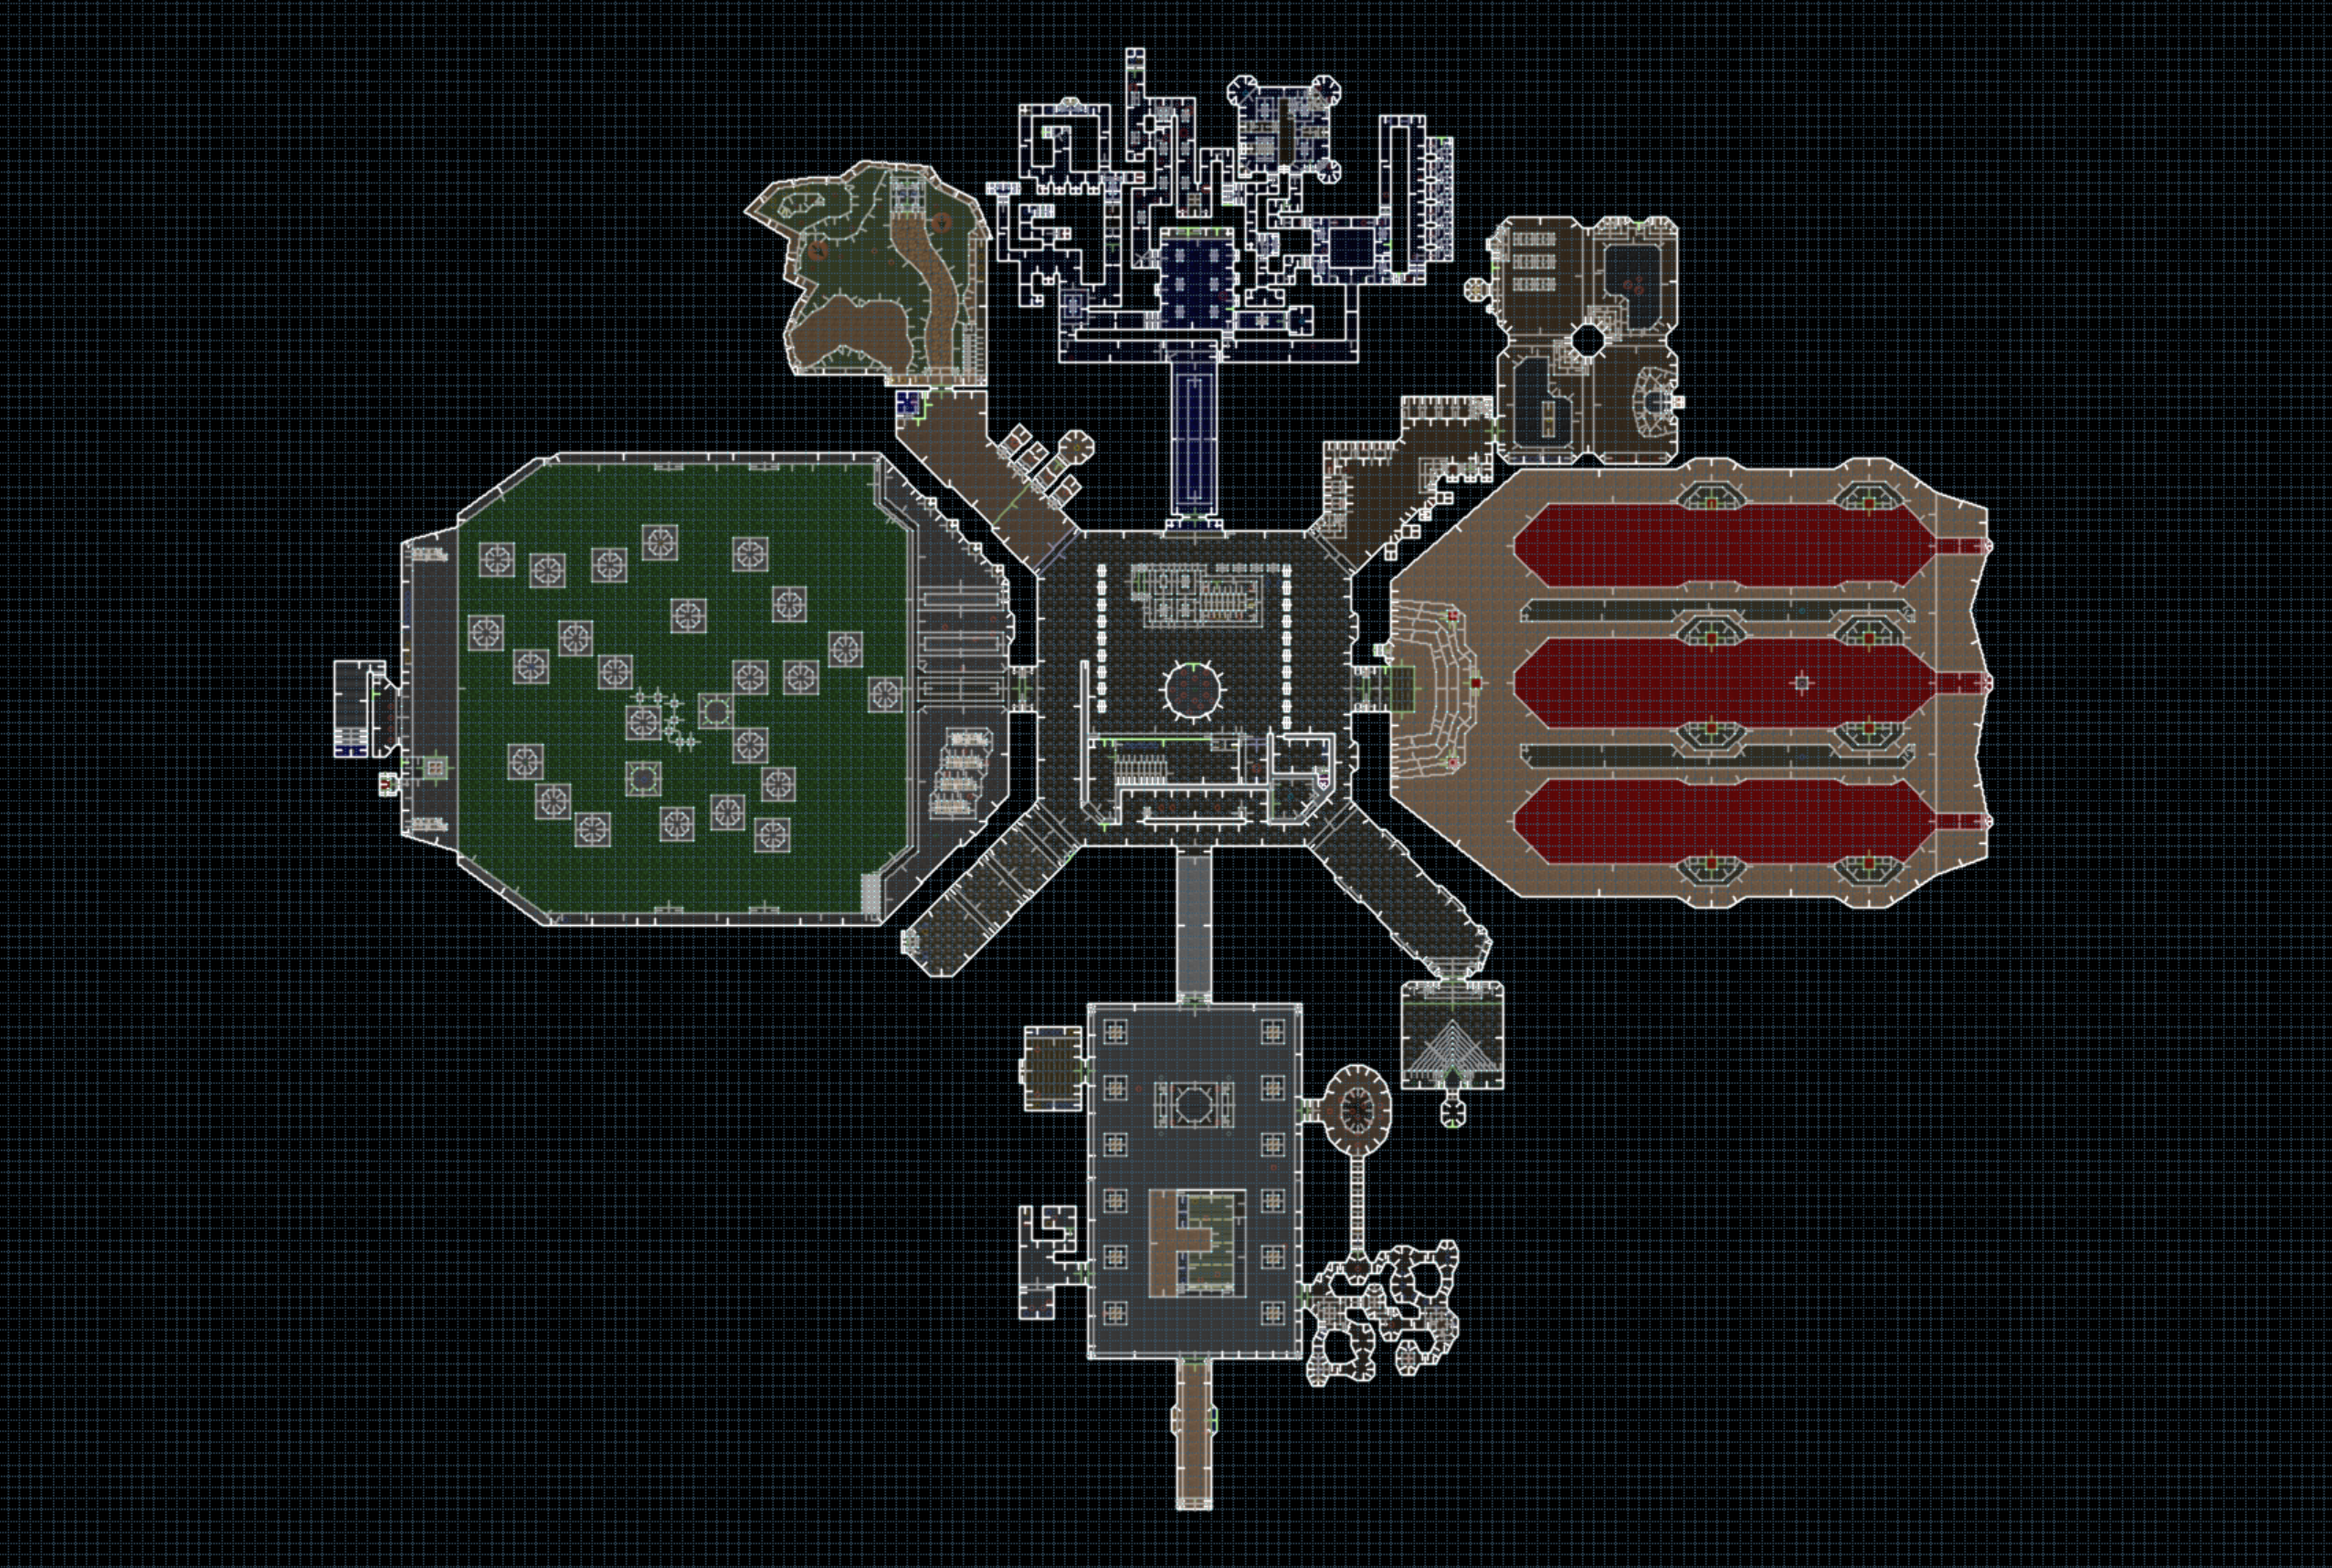
I have played my fair share of DOOM and DOOM II and there is an amazing community of map makers that create far superior maps to my own over at DoomWorld.com. In fact these community WAD files have really taken this game to another level of capability and I was soon humbled by the work this community does in its map and mod making.
When I set out to make a map I think these were what I wanted to explore:
- How are Sectors defined?
- How are elements linked together such as events for opening doors and connecting switches?
- How are enemies balanced and item placement best suited for gameplay?
- How do we capture that asthetic of DOOM level design?
- How do you make something fun to play?
I referenced a lot of ChubzDoomer's videos for my tutorials and especially his great video on Jon Romero's level design rules. Those level design rules were great on making the areas seem pleasing to the eye and enjoyable.
The rest of the success I felt came from closing my eyes and envisioning a feeling of playing a DOOM area I had hoped to play before. I believe this was best achieved in the Flooded Tunnels of the level, which I feel are the best parts of the whole level.
If I had to stack rank the areas of the level that I believe are best they are:
- The Flooded Tunnels - it really captured unnerving, dangerous yet balanced feel
- The Hub - the Imp cage and chaingun room are one of the coolest areas
- The Dungeons - this is the most challenging boss room with just enough to defend yourself
- The Blood Baths - a good concept but a bit long to complete
- The Poison Pistons - another good concept but a bit too challenging and frustrating at times
- The Apex Room - this elevator area was asthetically pleasing to me a lot
You can always return to the Hub Tunnel's main exit to check your progress which was helpful. Some areas that I believe this map suffers in:
- Some rooms are too large. Large spacious doom levels are hard to decorate and lack that congested dangerous feeling and focus on a particular level elemnt.
- Each section of the level is unique in its design and style and as such the overall parts feel a bit mismashed.
- Some game mechanic areas like the pistons and blood bath crushers are cool ideas but a bit too long.
After building this level, playtesting (a lot) and polishing it up I have really come to appreciate the level design from the original DOOM games and the work that was put in with the older tooling and coding to complete what they did. It is a time consuming process but very rewarding.
Download the HEXADEATHIMAL.WAD file to play yourself
Nevertheless, lets dig and go through the nuts and bolts of this level ourself.
DOOM Builder Level Creator
There are a couple of options when it comes to making a DOOM WAD level and I chose to go with the fantastic DOOM Builder Map Editor software.
Doom Builder provides a complete interface for creating a DOOM level, or any level for DOOM, DOOM II, Hexen, Heretic, Strife etc. Its interface is very intuitive and relatively quick to get the hang of. But for the most part we want to focus on the main editing tools this map editor provides.
The Setup
When creating a new Map we are presented with a setup menu that makes a lot of sense if you have read the first part of this series on the engine and WAD format.
We must first select a Configuration, which is more or less the supported engine format that we will be building our map in. This is very important because each format has limitations or extensions of other formats. For instance the original Doom format will be the most pure but also the most limited and will not support ACS scripting that was added in the later formats defined by Ravensoft. If we plan to run this on a modern engine like GZDOOM then we can choose any format, but the format with all of the bells and whistles is the ZDoom (Doom in UDMF Format). This format is a newer universal format that includes all of the upgrades from the later iterations of the doom engine and will give us the most options when we create our level. It won't be playable on purist engines like Chocolate Doom or DOSBox Doom, but it should let us showcase what we can do and give us the breadth of opportunity for learning.
So for HEXADEATHIMAL I went with the ZDoom (Doom in UDMF Format).
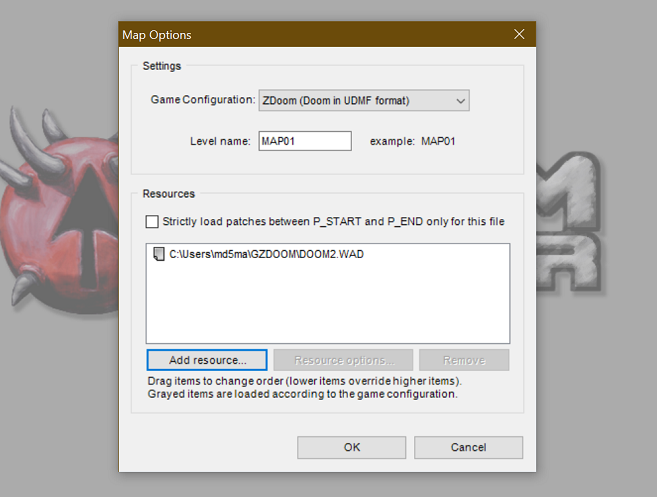
The second section of setup is also very important. Recall back to the last part where there are two types of wad files: IWADs and PWADs. Doom Builder exclusively builds PWAD patch wads as levels only. This means we are building a level that overrides a level in a base game IWAD and explains why we must type in the Map name we are overwriting.
In the Resources box we must select our base IWAD file and for HEXADEATHIMAL I chose DOOM II as that WAD base gives me the most Doom Sprites, weapons and powerup upgrades available for us to use in our level design. You will need the base DOOM WAD files for making levels and they are relatively easy to purchase on Steam and can be found in the base folder of the game's installation drive. Don't pirate it, support it!
Running with GZDoom or Zandronum
GZDoom and Zandronum are modern ports of the ZDoom engine, which was a port of the vanilla Doom engine. They provide 3D rendering of the WAD map world with modern FPS controls and graphics settings. They also support a better networking capability for finding and hosting multiplayer games. I find these engines essential for modern Doom gameplay, and they are mandatory for any levels made with the UDMF format we have selected. I personally use Zandronum.
If we associate WAD files with GZDoom or Zandronum then we can simply run our level by double clicking it in our OS. Additionally there are command line options for running a WAD file in these engines or for the server version.
Let's get started looking at the HEXADEATHIMAL level and exploring both Doom Builder and DOOM Level design concepts highlighted in each section.
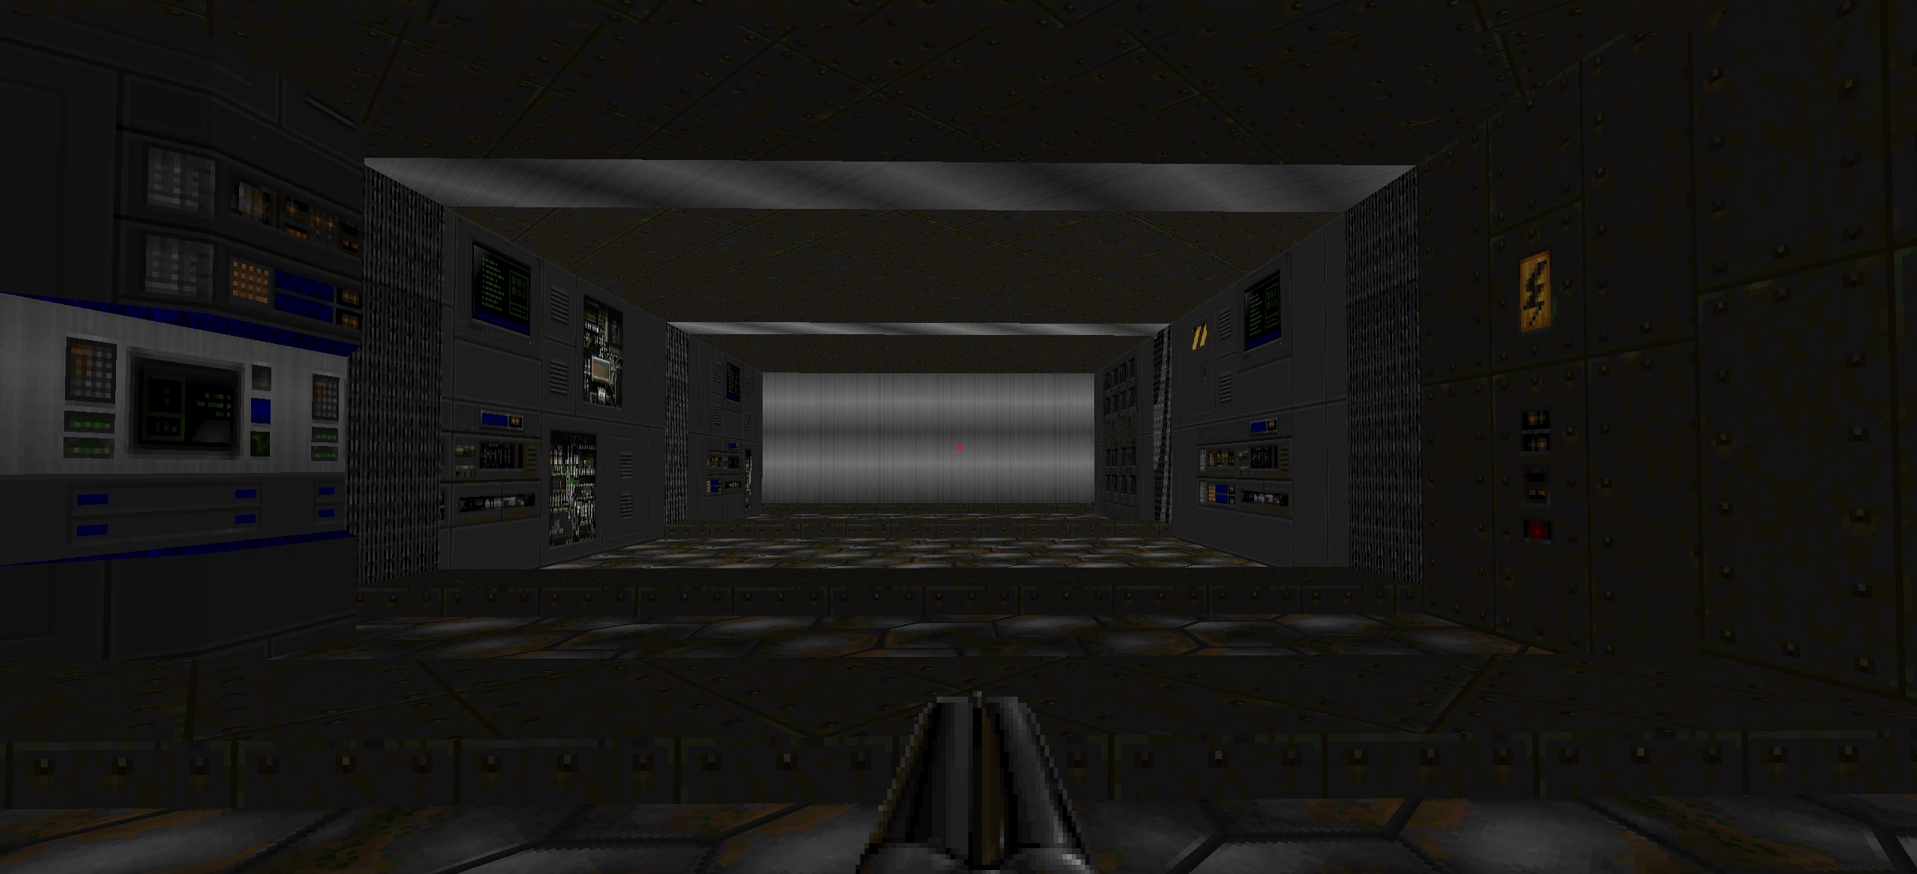
The Entry Forum: Sectors, Doors, Enemies and Things
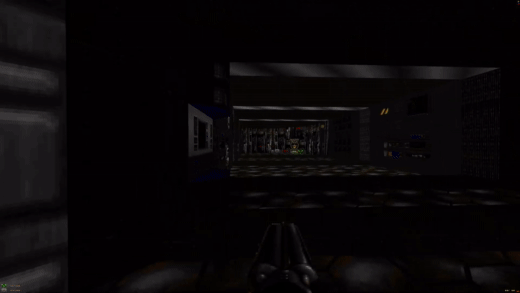
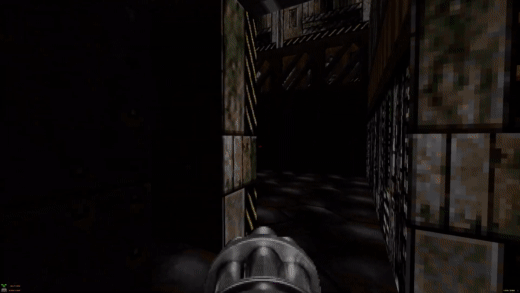
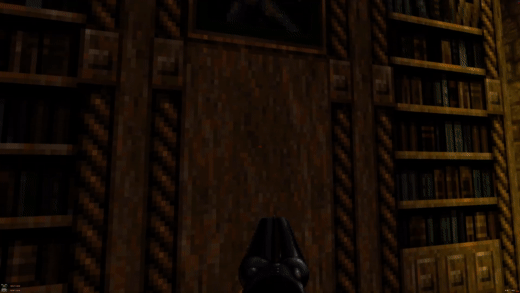
The entry part of the forum consists of a starting tunnel with a soldier busy monitoring a computer terminal. It captures the feeling of arriving at this base unsuspected with the guard distracted and easily dispatchable. We are able to collect items and venture into the main entry area.
Let's use this first room as a way to talk about Sectors and LineDefs in Doom builder.
Doom Builder consists of building modes, one for each main lump of our WAD files: Vertices, Sectors, Lindefs, Brightness and Things.
Sectors
The entry tunnel is a set of primitive Sectors, with a couple of concave wall portions containing the terminal and the textures.

A Sector is basically a collection of Linedefs with a floor and ceiling texture and floor and ceiling height. We must subdivide Sectors whenever we desire texture changes or elevation changes in our level. Sectors are essentially polygons with the vertices forming the LineDefs. We can place the vertices at any position but is much saner to use the grid system to retain alignment. The only place I struggled with the default grid system in Doom builder would be to create walls with narrow textures such as the red, blue and yellow keycard ones, but overall the grid system is basically mandatory for sane level design.
We do incorporate some elevation changes with our concave terminal area:
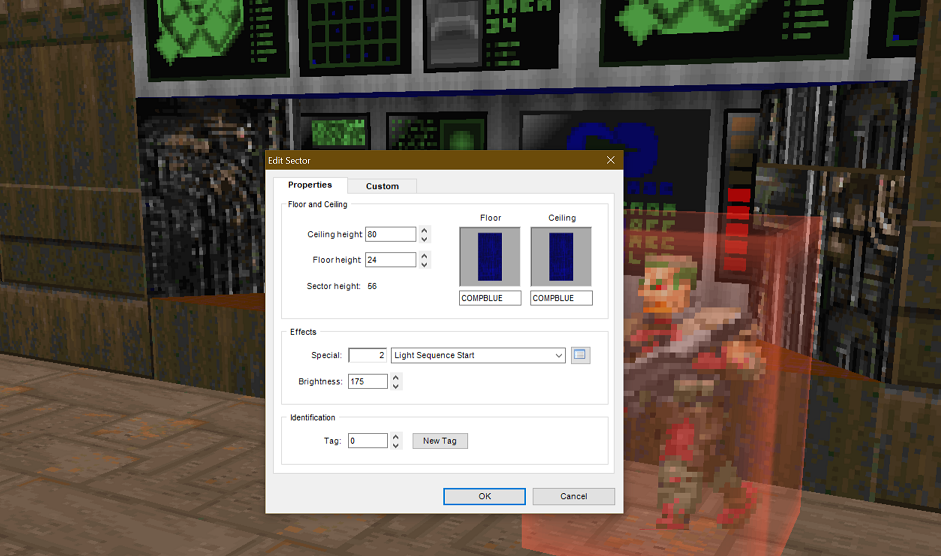
With our Sector editor we can control the ceiling and floor textures, brightness level and heights of the floors and ceilings. Additionally we can define a tag id for a Sector which will be incorporated later into events and triggers.
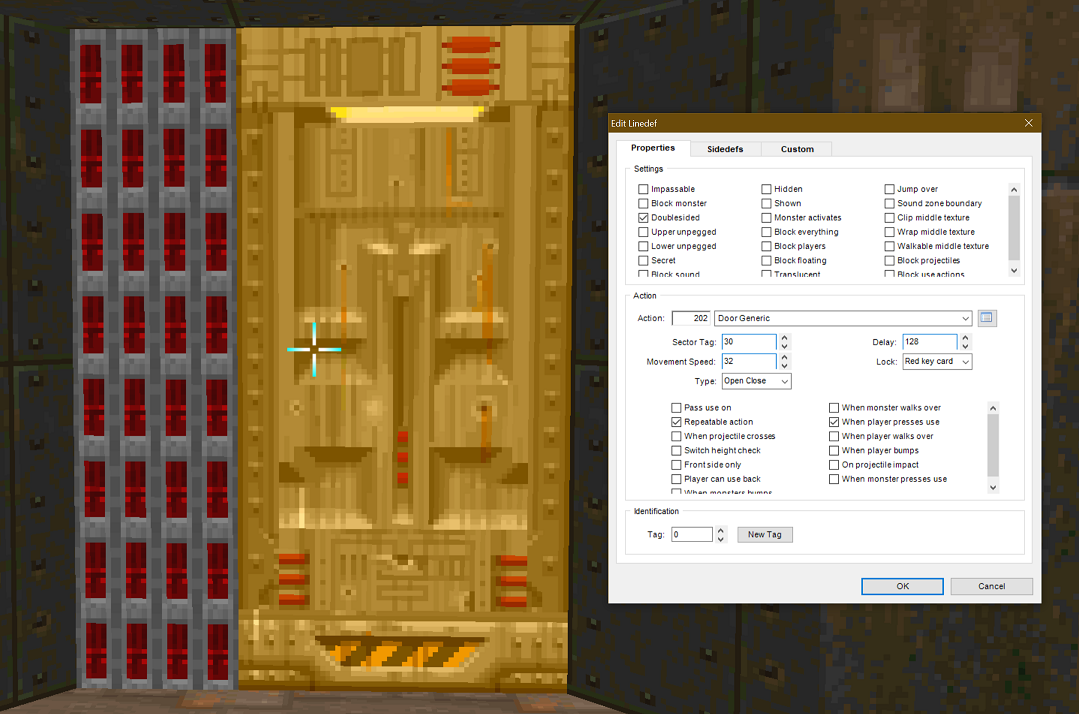
The entry area is also where first experience a Door in DOOM and how to wire it up to work.
Doors
Wiring a door up is relatively simple, but there are somewhat confusing options around what we can select. There are a variety of behaviors for doors we maybe do not consider while playing normally. Is it locked? Does it automatically close? Can it be opened by enemies? Can it be opened by bullets? These all correspond as IDs and attributes on the editor screen stored in the LineDef data of the WAD file.
When we choose Door Generic as our action type, we need to specify the Sector tag id that it will raise and lower. This also means that the Sector should have the ceiling lowered to the floor and the LineDefs with textures fitting to the door on either side. We would configure a LineDef similarly on both sides, but they could be configured differently, such as one side being locked and the other not.
We can also control the door speed, lock type (which are limited to our 6 locks in game) and several flags we can specify for behavior. We will cover some more complicated doors in later parts.
Our First Trap
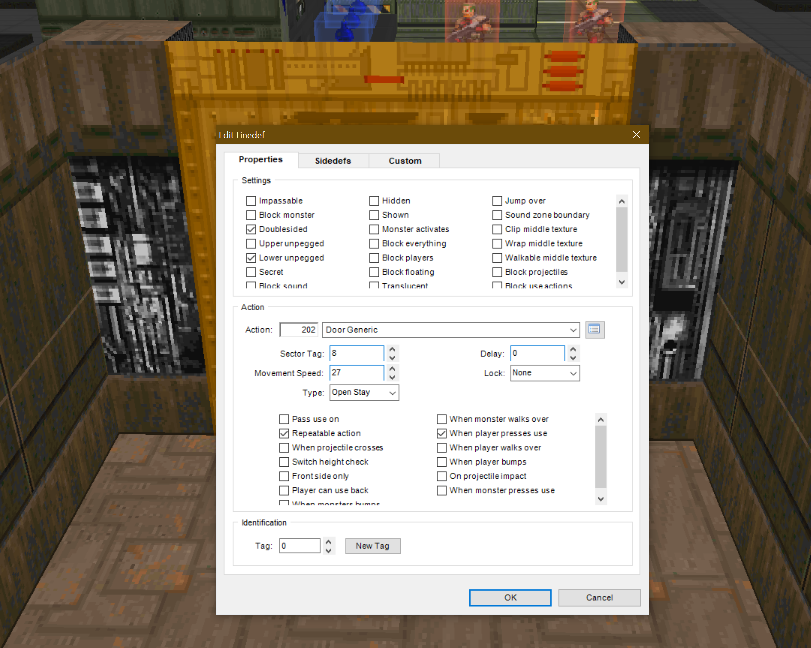
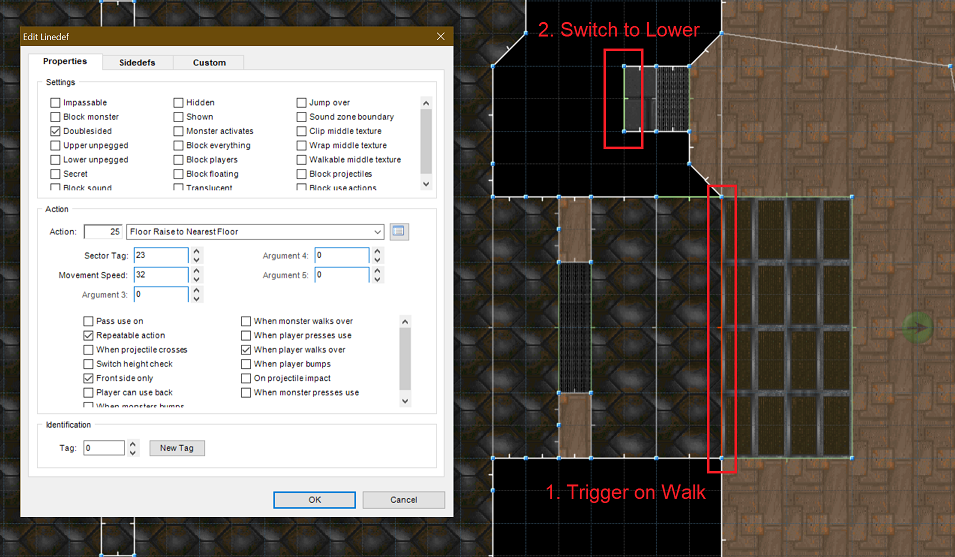
I wanted to incorporate a trap, and a traditional DOOM approach was to open a door revealing enemies unexpectedly. I try and clue the player into secret locations based on texture changes and walls so someone observant can prepare themselves for something conspicuous. Our first room to the left of the main entry has a trap wall within it that when a player passes a certain LineDef the wall is lowered revealing some enemies within it.
We can see in the LineDef editor here how we are listening for the event when the player walks over the LineDef. This is important for the way the LineDef is facing as well. This LineDef is not a wall and is essentially invisible. When it is crossed we lower the Sector wall blocking the enemies with a Door Open action. This is different that the previous Door Generic because it does not close. This reveals the enemies behind the player causing an unexpected battle.
Here is that trap in action. Watch how I round the corner and cross the invisible line.
The Shadow Maze: Lighting and Secrets
Off to the east side of the Forum area is a zone I called the Shadow Maze. It was where I first started playing around with lighting levels more drastically to create the clustered tunnel feel. But more particularly I also established this as the first place I wanted to create a secret area.
Lighting
To give a lifelike feel to the narrow corridors I placed extruding light fixtures above certain areas with radiated fading light. This radiated light had to be done with sectoring out different light levels around it and was a technique I used in a variety of lighting areas thereafter.
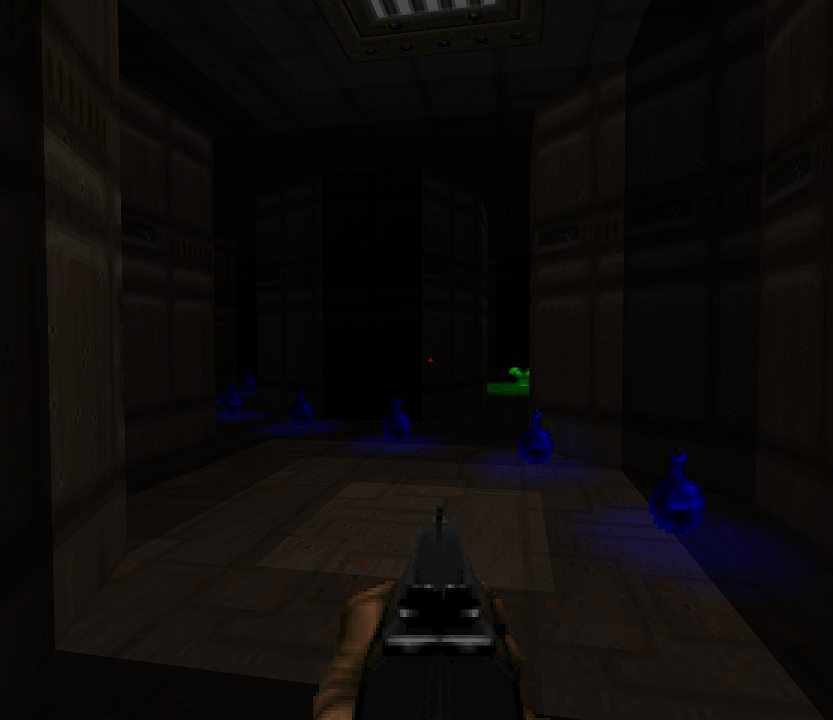
Secrets and Light Phasing
Adding Secrets to DOOM is essential and should be a rewarding experience. Given the dark areas I knew picking out the texture difference would be tricky to do, but to the observant player you could find a mismatched texture guarded by an Imp. Behind this area was a place that ascended to create a great view into a holding chamber for zombie soldiers. This secret area would be rewarding in both tactical advantage and a couple of items to boost with.
In particular I wanted this area to have strobed lighting, which was a type of Light Phased as an effect which provided the feel.
Secret Sectors in the UDMF format require a different Special flag value than traditional DOOM and to tag a Sector as secret this must be 1024. But in order to facilitate Light Phased a Sector must be of value 1 and seemingly we would be at an obvious impasse in our options.
But I am also aware that the engine actually uses this integer value and bitmasking to uncover which flags are stored within, so by supplying a value of 1025 I was able to incorporate both values into one and the engine zoned the Sector for both phased lighting and a secret area.
The other areas of the Forum part of the level contained more doors, enemies and ammunition for the player. The overall design attempting to feel like a lobby of a high tech corporate facility. But lets move on to one of the more interesting areas of the map, The Hub.
The Hub: Switches and Teleporters
I had a vision for the hub being a scientific research area of this facility. I saw a large caged in section for imps with a glass room for observation. I thought to myself, you know, it would be awesome if we could mow down the entire imp chamber through the glass viewing area with a chaingun and I felt like that became the highlight of the area. In order to facilitate this the area introduced its first set of levers and dynamic stairs. Additionaly I wanted to incoporate another secret area into the Hub area.

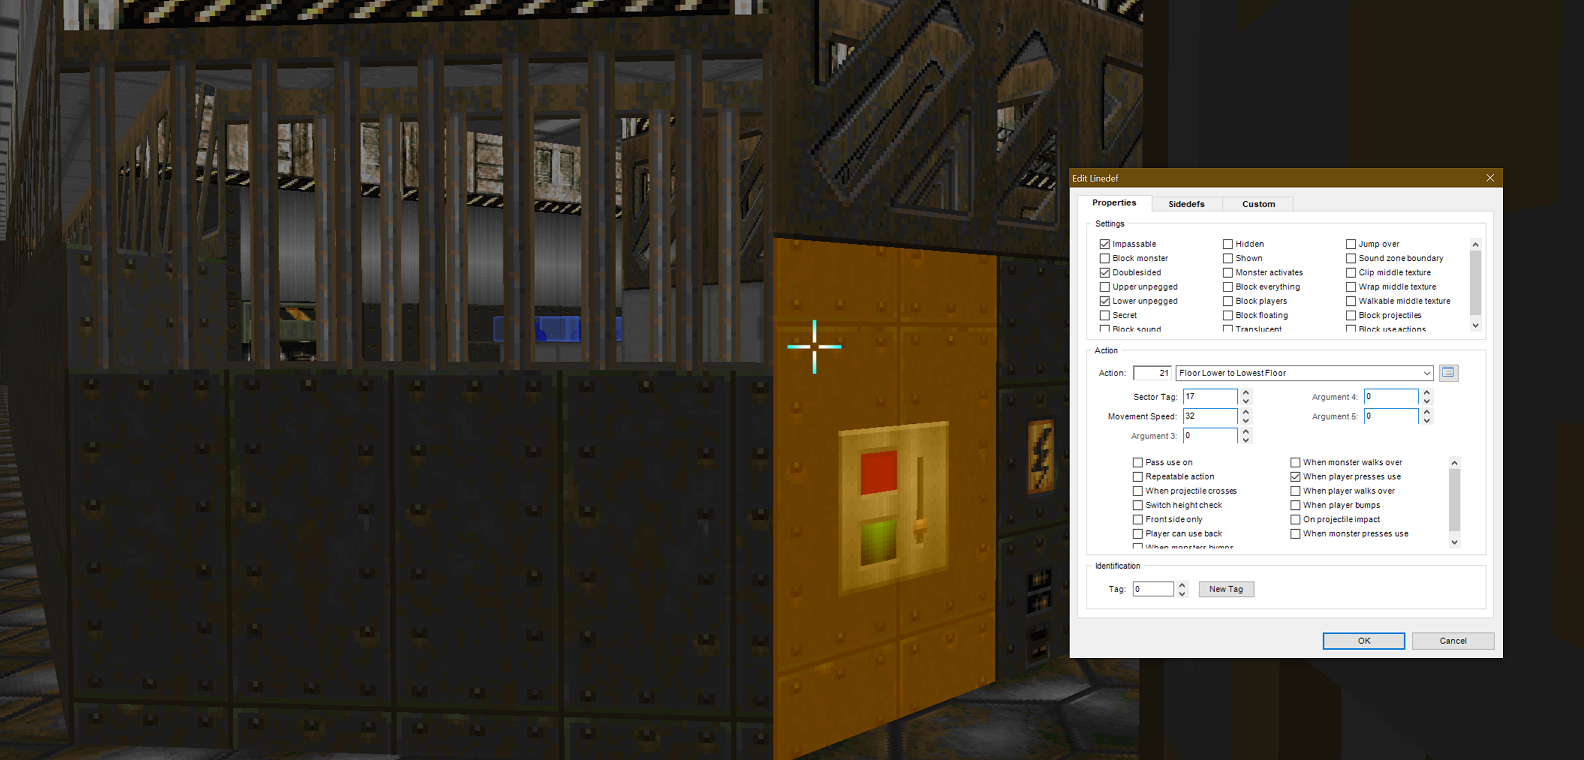
Switches
We can remotely control a Sector's properties like ceiling or floor position to facilitate raising or lowering a remote door. The action Floor Lower to Lowest Floor looks at its neighboring Sectors and determines the elevation of the lowest one and lowers the section tagged to match. By applying this action and Sector tag to a LineDef can produce the desired effect of lowering a wall to create an opening. One thing nice is that the texture of a switch will automatically switch to its inverted state to show it toggling its effect.
Once inside the room we get to a really interesting switch where we are going to raise a dynamic stair case which elevates one step at a time. This second switch uses action Stairs Build Doom which facilitates the effect we desire.
This action will target a Sector and cascade the elevation effect to all Sectors that have a LineDef facing toward this Sector. Additionally the elevation targeted is a distribution across the number of steps and the final elevation found the be neighboring Sector with a LineDef facing away from the cascade.
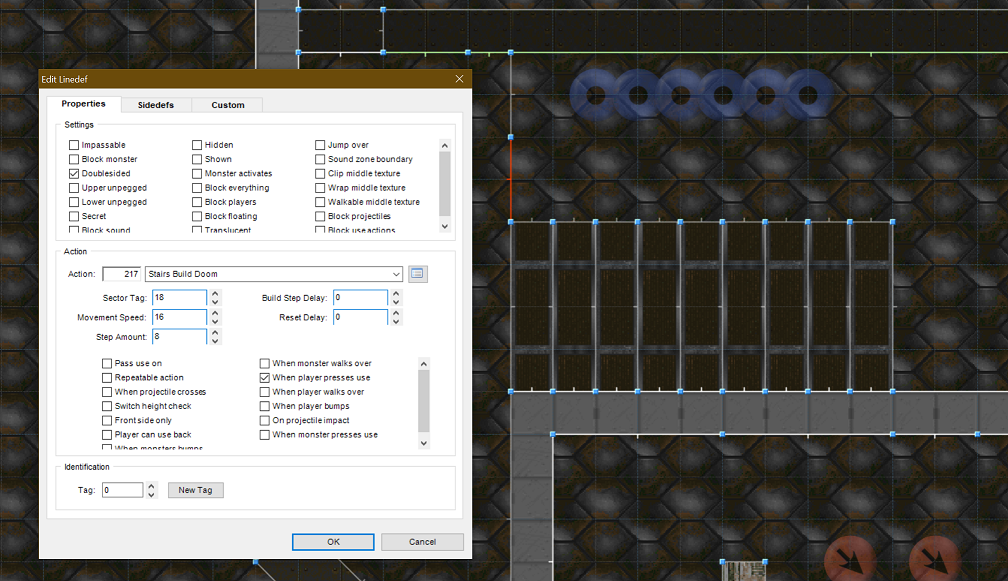
The effect and the experience is great!
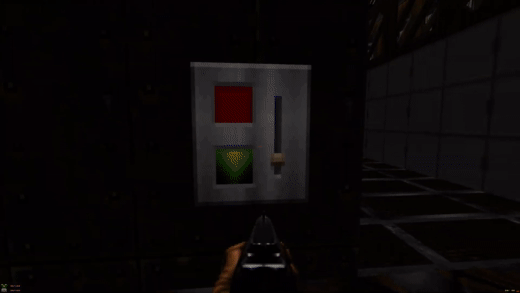
Transparent and Breaking Glass
To the keen eye you may notice the effect of the glass panel viewing the Imps break when shot with the chaingun. Glass style panels themselves are little tricky, but breaking glass altogether is another level of complication. To complete it we must use Action Code Scripting. Lets take a look.
I find that the best way to represent glass is with the texture SHAWN2 as the SIDEDEF and with the translucent setting enabled. Make the LineDef double sided with the texture on both sides so that the glass will appear on both sides of viewing.
But how to facilitate the effect of the glass breaking on impact? We introduce Scripting to accomplish this, but first we need to set some additional settings:
- Block Sounds
- Impassible
- Block Projectiles
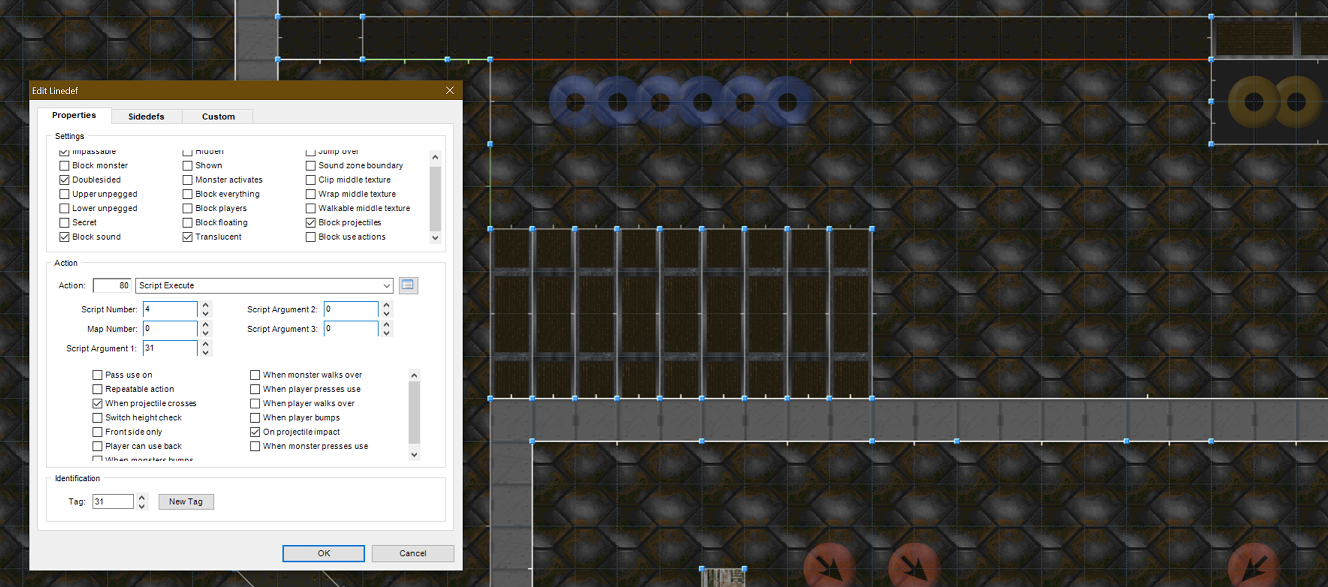
Then for our action properties we want to execute a Script with ID number 4 and an argument with the same value as our Tag ID. These settings may seem contradictory in some ways but actually allow us to trigger the script when the LineDef blocks a projectile. It is also impassable while it is in place but once its broken we can cross through it.
So now for the magic custom Script:
// Glass break
script 4 (int lineid)
{
    // remove the chosen texture from the sidedef so as to make it disappear
    SetLineTexture(lineid, SIDE_FRONT, TEXTURE_MIDDLE, "-");
    SetLineTexture(lineid, SIDE_BACK, TEXTURE_MIDDLE, "-");
    // unset the special flag so we do not trigger this script more than once
    SetLineSpecial(lineid, 0);
    SetLineBlocking(lineid, OFF); // allow to walk through
    Line_SetBlocking(lineid, 0, BLOCKF_PROJECTILES); // allow enemy projectils through (if set to projectil blocking)
    // and finally play some ambient sound effects to make it sound like you are breaking glass
    AmbientSound("spider/walk",127);
    Delay(4);
    AmbientSound("spider/walk",85);
}
This world of scripting was not a part of the original DOOM engine but was added by Ravensoft to facilitate elements of Hexen and Heretic and gives us a powerful new tool to create very interesting effects in our map. The lineid parameter is important and matches our first argument in our editor screen so we can modify the glass value. It also lets this script be reusable for any LineDef we desire in the future.
Moving on lets explore another element of the hub area: the teleporter.
Teleporters
If you make it into the central area and past the Imp cage you will find a Sector with teleportation properties that port you into the Imp cage itself. This is doom for the haphazard wanderer who does not deal with the imps prior. From within the cage we use a switch to transmit another teleportation into our secret area with our powerup.
Lets take a look at the first teleporter that uses player movement to trigger. We facilitate the teleportation with the player crossing a LineDef and trigger the action to teleport to a Thing with ID 19. There are Thing objects we can place that are Teleporter Destinations which can take a Tag ID to specify for teleporation purposes.
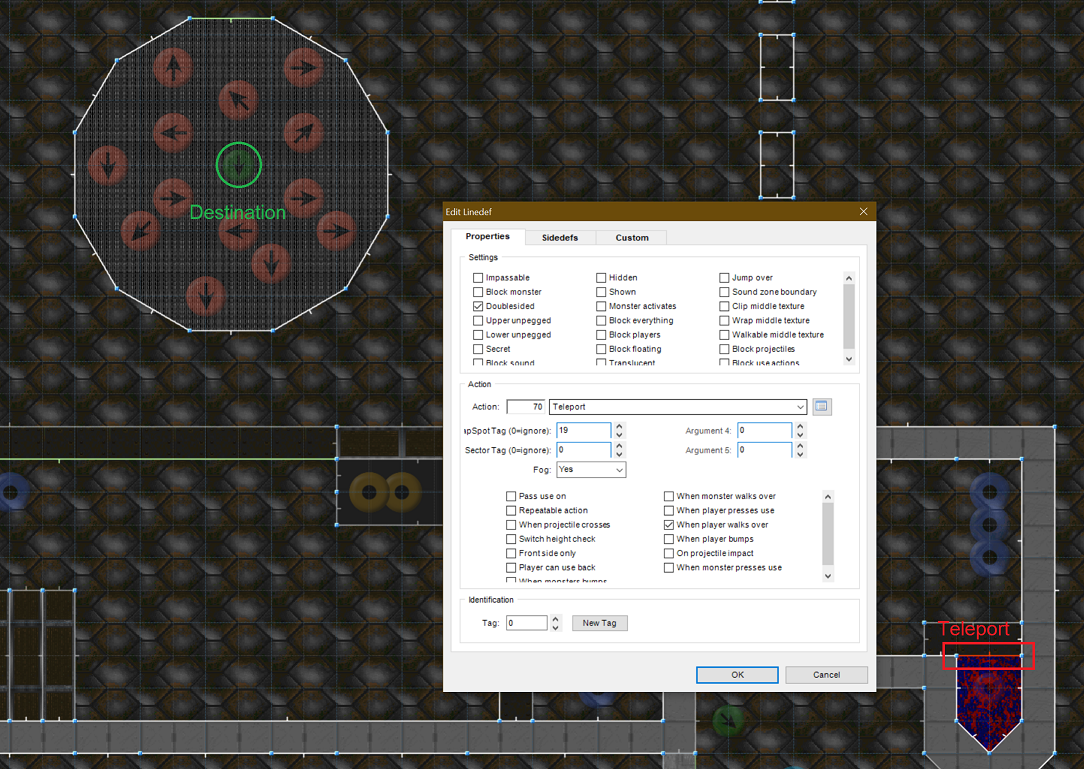
Once we have it wired up, we can similarly wire up other teleporters off of other events like pressing a button. Adding some other decoration Thing objects help show teleporter locations and I prefer the Particle Fountains for this. See our teleporter in action here.
Other notable elements of The Hub:
- We placed a Pinkie with the
Deafflag on it so it would hide until the player passed within visual range - Another room has a switch that spawns a Revenant enemy if pressed
- In the secret powerup room pressing the wall lowers it to let us escape
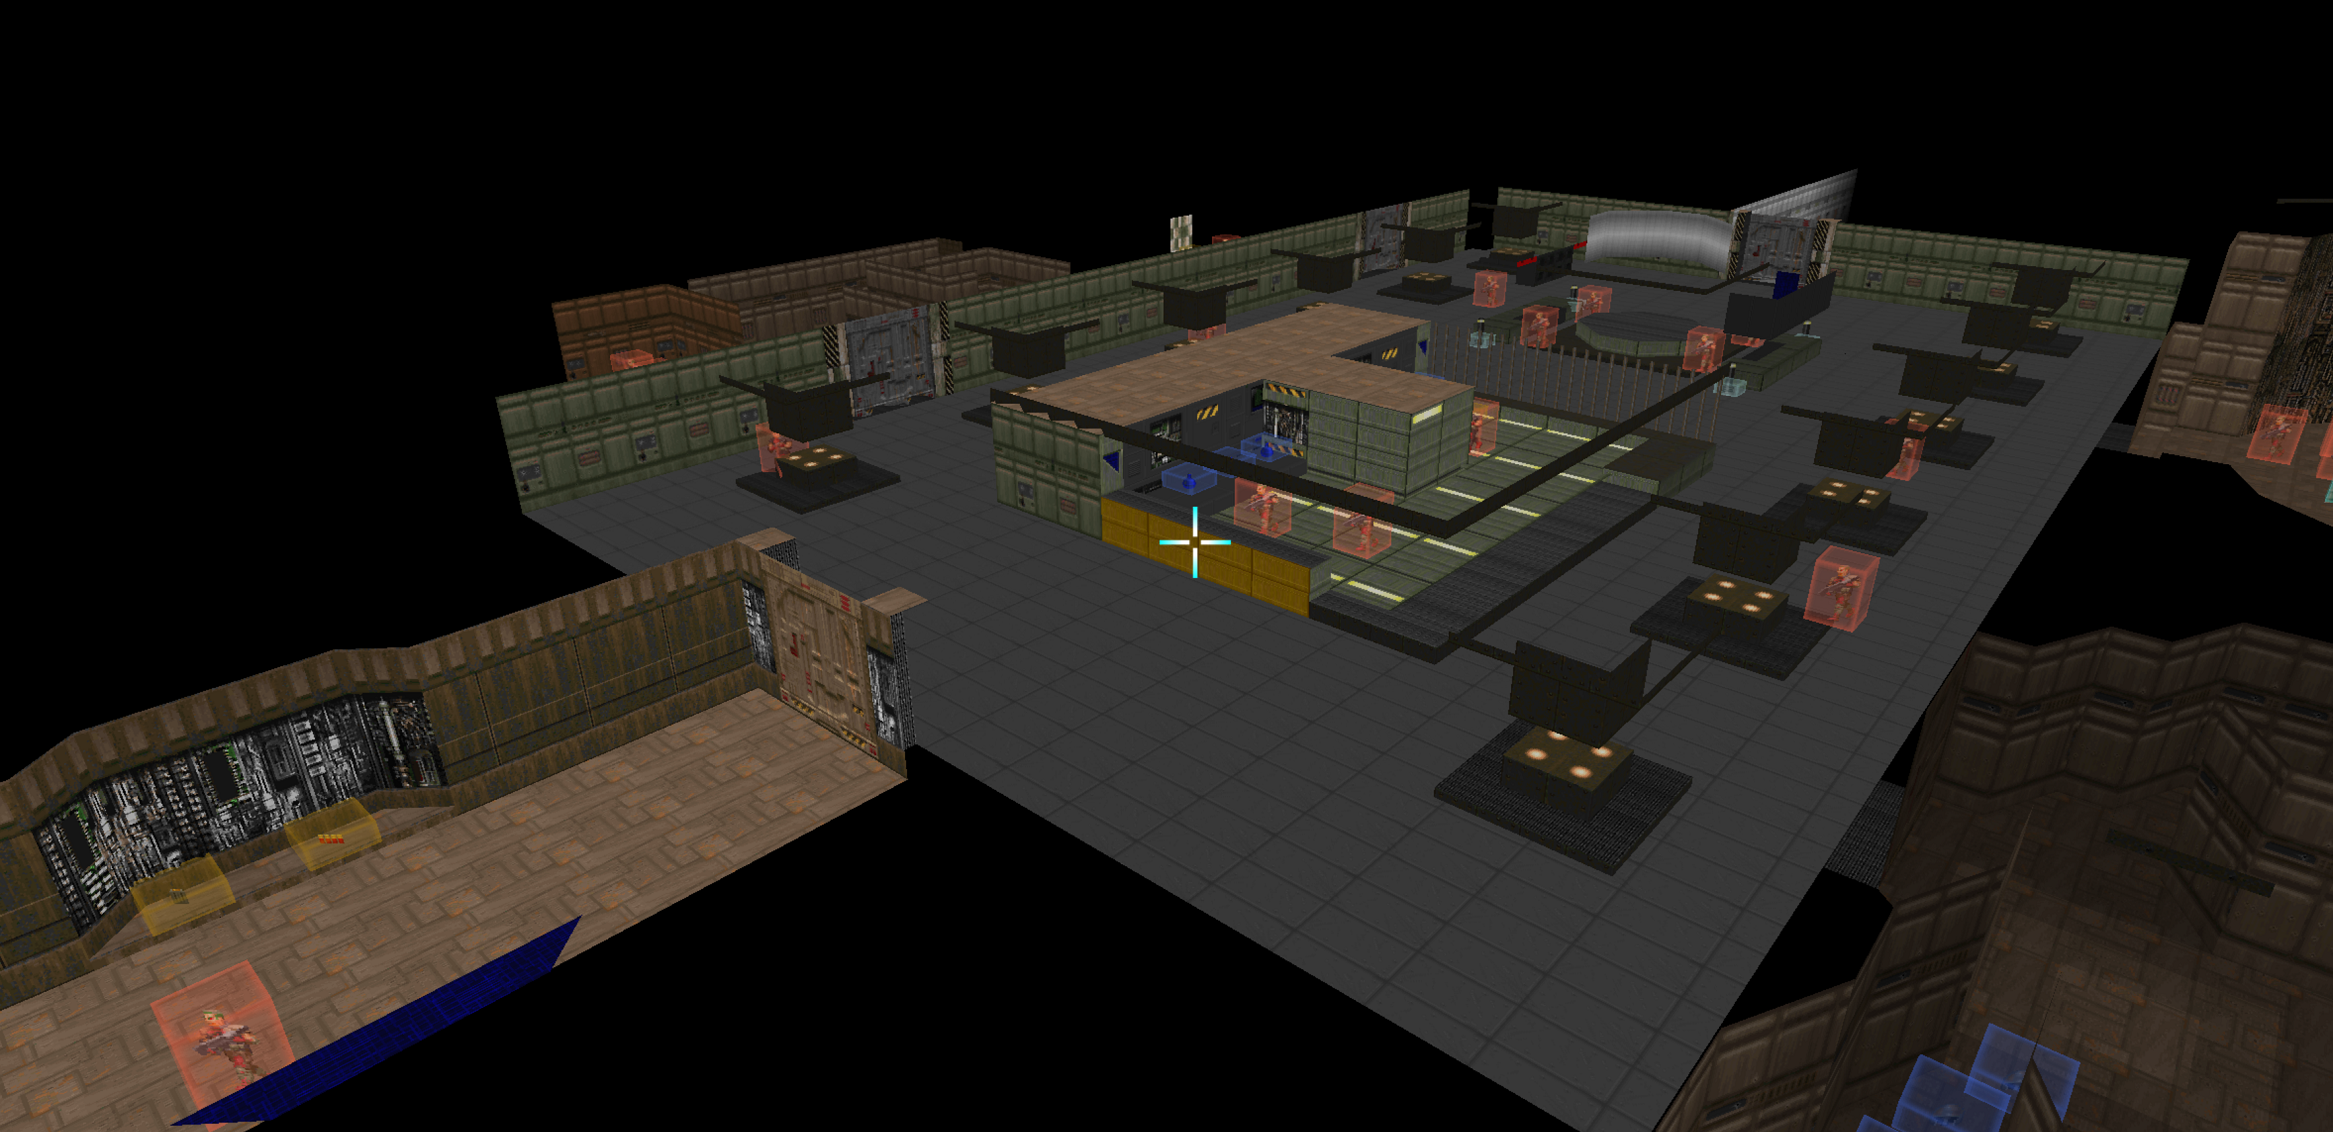
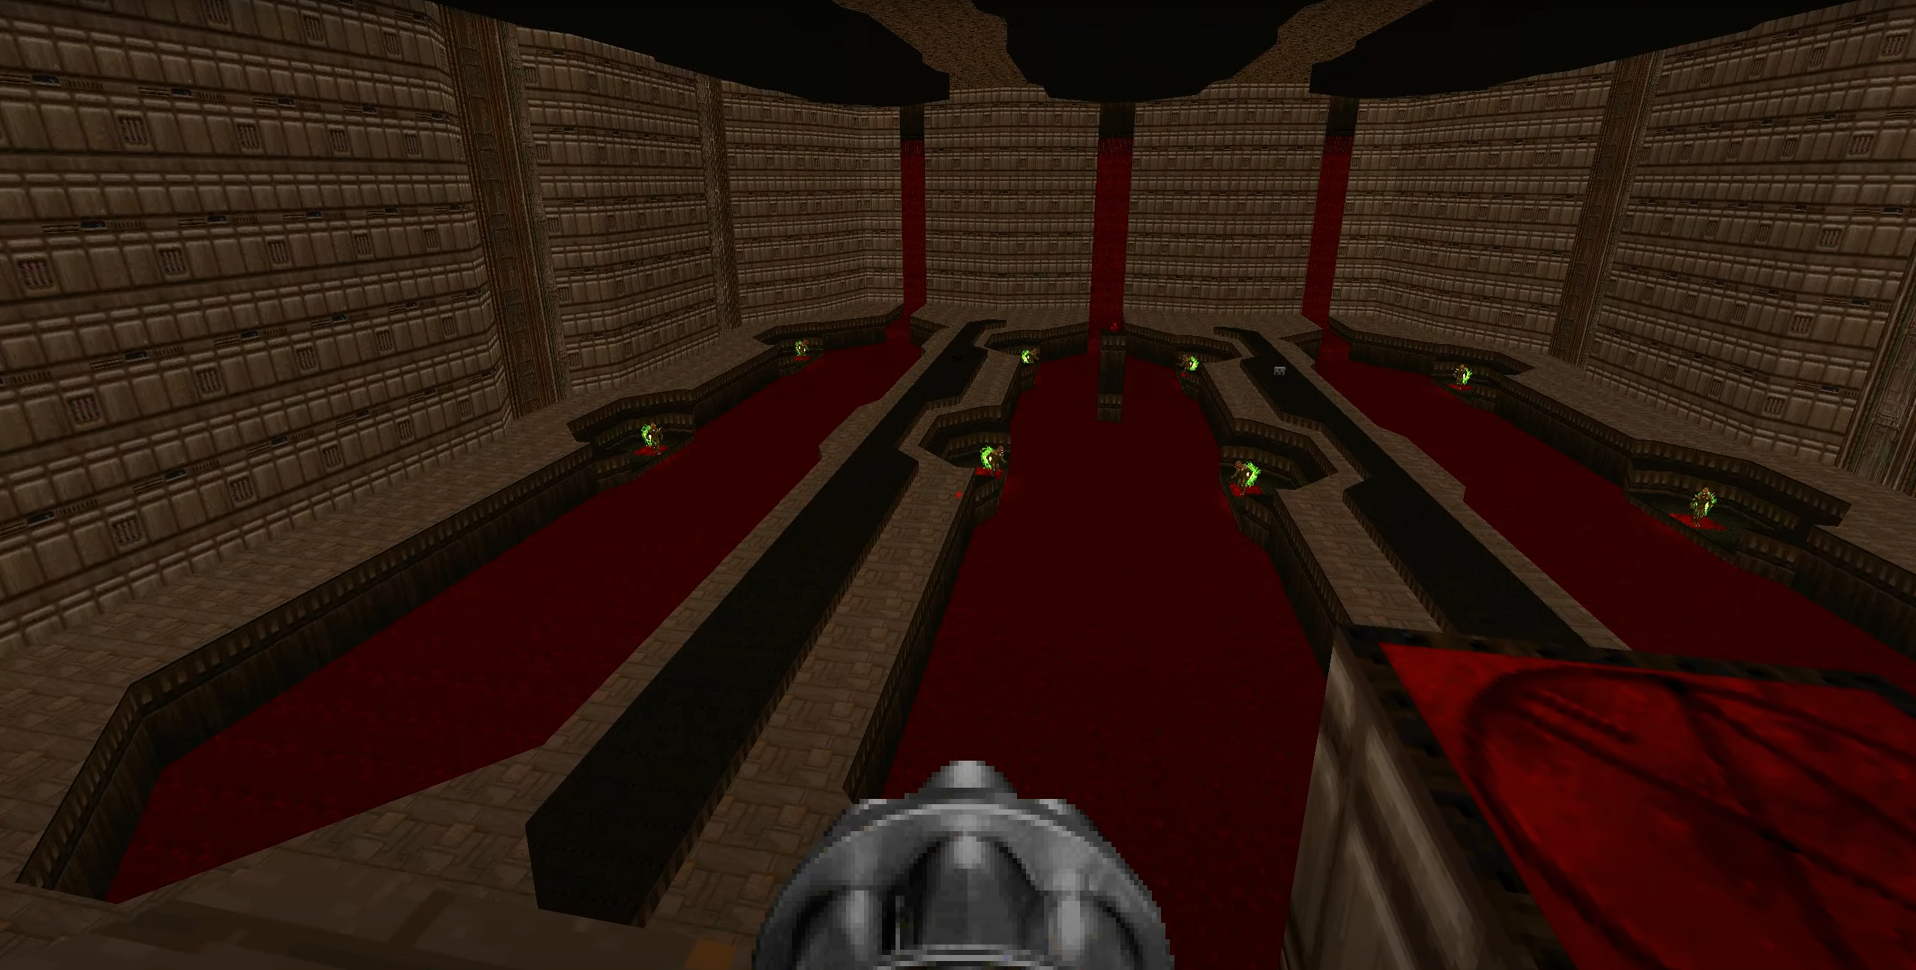
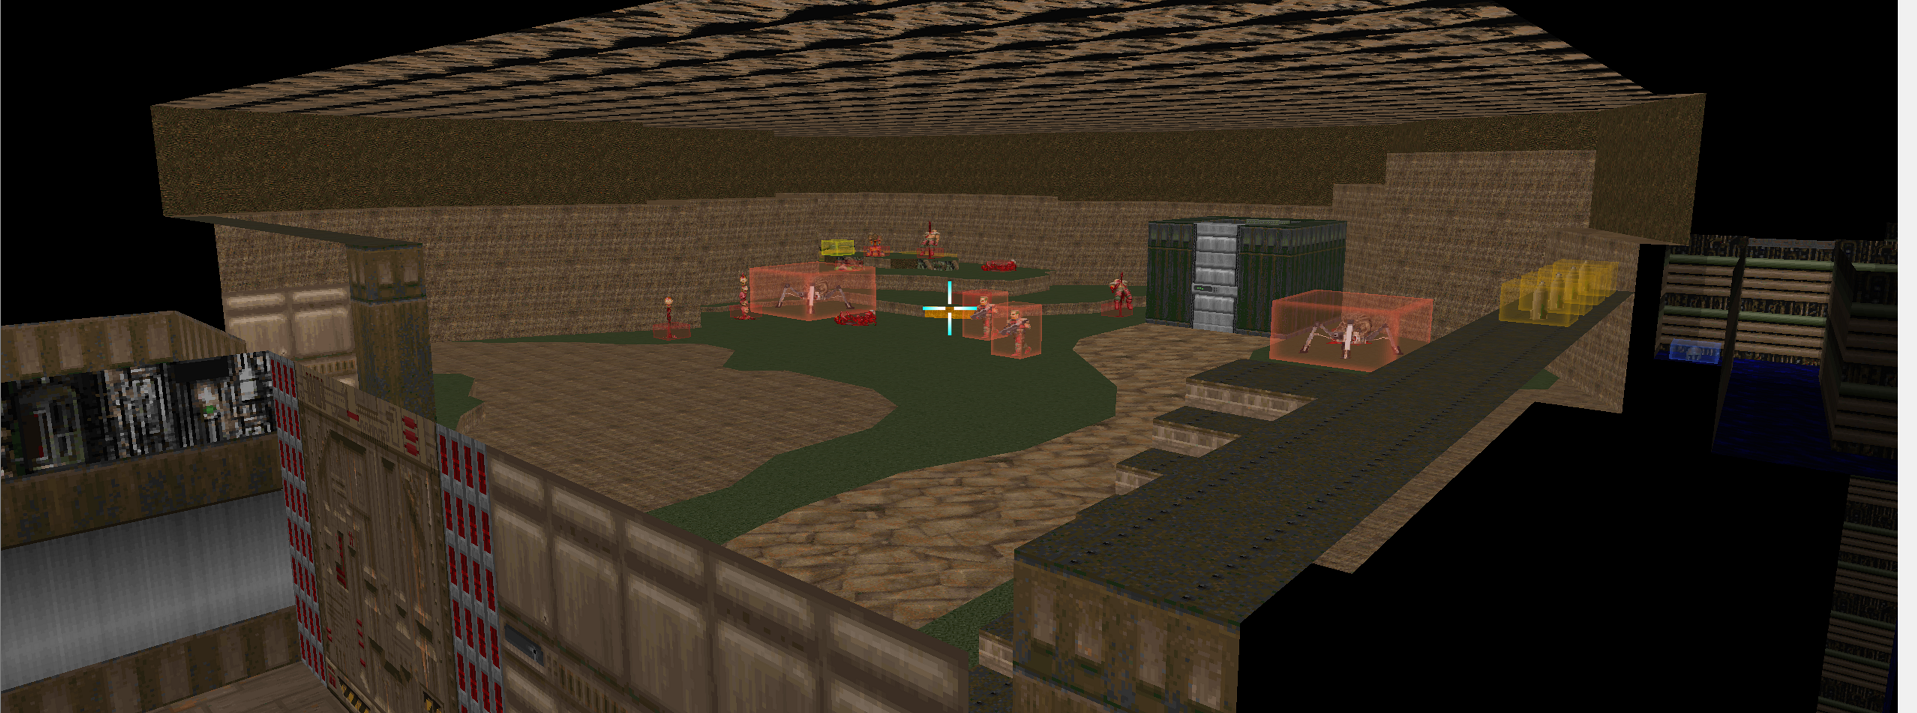
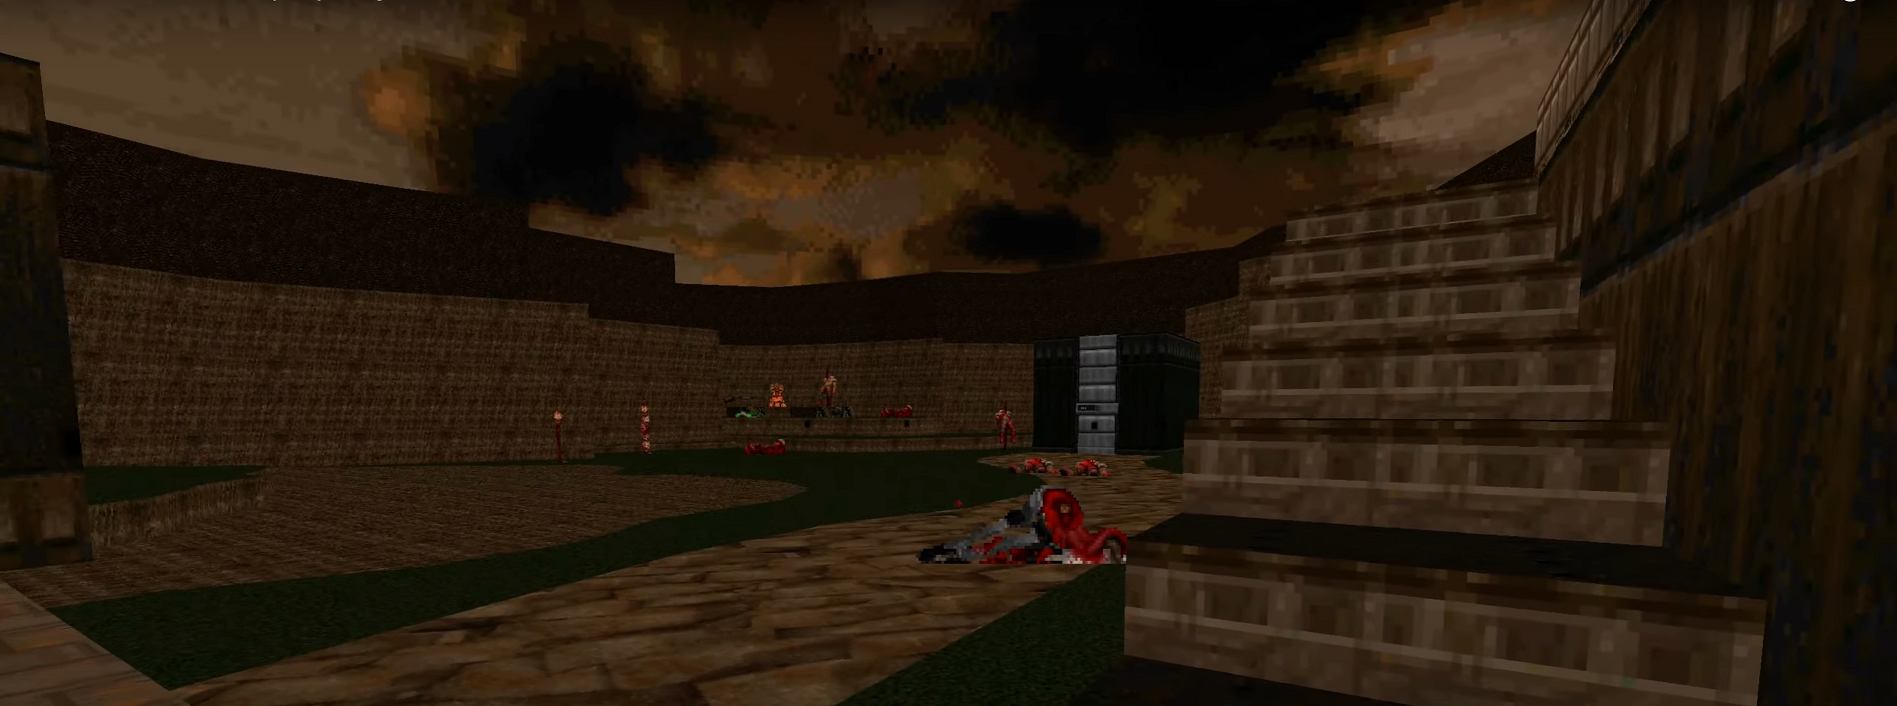
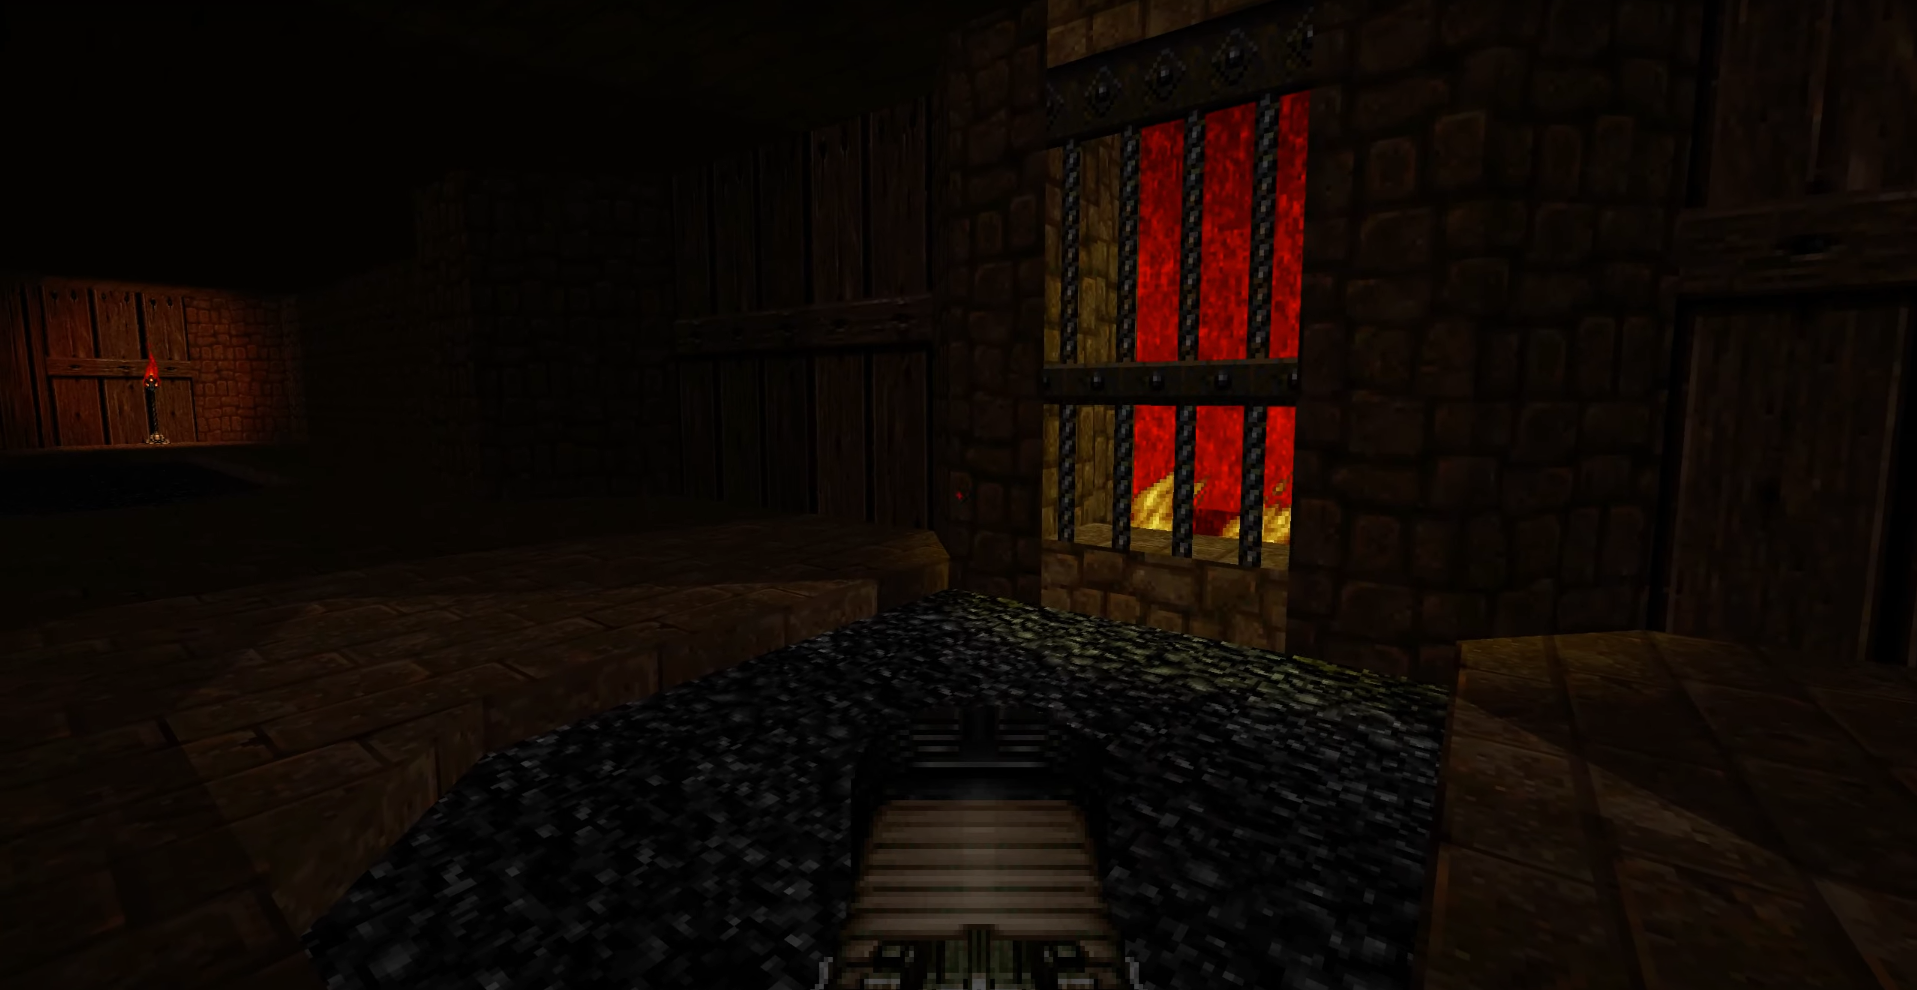
The Blood Baths: Elevators, Timers and Keys
We next venture into The Blood Baths, a particular zone built to test the players puzzle solving and nimbleness. It introduces our first elevator and timing mechanic crushers. We also find our first key, the Red Keycard within its chambers. I enjoyed making this level and feel like the idea could probably be shrunk down to something a little more focused but nonetheless it came out novel in my opinion.
Lets take a closer look at the elevator leading into this chamber.
Elevators
We have seen several concepts that lead into elevators when we explored the stairs and walls raising and lowering within The Hub. But this elevator has some extra goals. I want to trap the player in the blood baths until the event is complete and as such the elevator must raise, trap them in, then be blocked from lowering until after the events are complete.
To enter the elevator we trigger the LineDef when walking over it to raise the elevator Sector to the floor above through the action Floor Raise to Nearest Floor which takes the Sector we are raising. Once the elevator is raised there is no corresponding LineDef to trigger it back down thus creating a trapped room.
In order to lower it we must hit a switch hidden behind a locked door, which is locked with the Red Keycard subsequently found in the chamber below after defeating the enemies with the crushers.
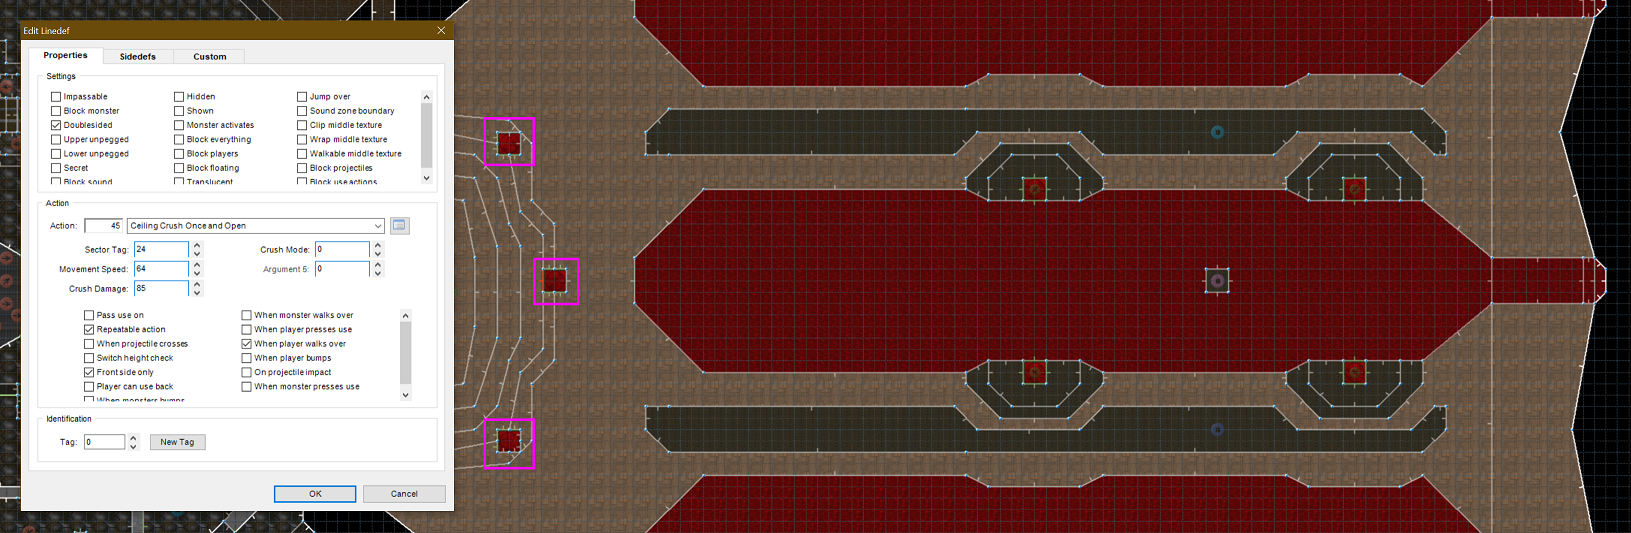
Lets take a look at the large crushers in the room.
Crushers
Our ceiling is comprised of three massive crushers that slowly lower into the blood baths below crushing enemies that are spawning in at increasing waves. To make it interesting the crushers are only triggered by entering small pedestals on the edge of a large drop off into the chamber requiring dexterity to activate quickly without falling.

Each of the pedestals are simply surrounded by LineDefs with walk triggers that activate a new action Ceiling Crush Once and Open. This action takes values for the speed and damage of the crusher, but the rest of the effect is coded into the engine. The ceiling height lowers to match the floor's activating crush damage to enemies caught within before returning. Because it is Once this requires the player to reenter the pedestal each time it is triggered.
But the crushers themselves are useless without the enemies.
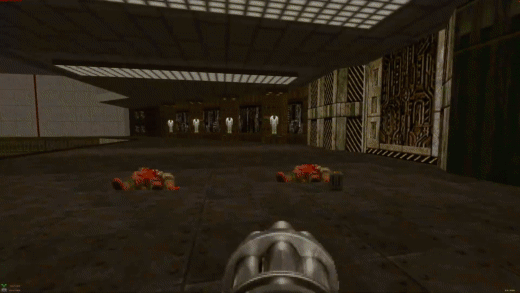
Scripted Spawners
The entire room takes advantage of ACS Scripting and enemy spawners to facilitate our messaging and our waves of increasing difficulty. Lets take a look at the scripts first:
// global variable to control triggering this room only once
bool spawnRoomInit = false;

script 3 (void)
{
    if (!spawnRoomInit) {
        elog("starting spawn room");
        // Print a string to the string introducing the area
        Print(s:"Your heart pounds within you.\nSomething is wrong in this place.");
        Delay(100);
        // Spawn room initiate
        int tid1 = 25; // teleport, all spawners in this room share the same tag id
        int rkid = 28; // redkey pedestal, place we can teleport back to

        bool spawn1 = true;
        int spawn1max = 24; // max of 24 spawn rounds
        int spawn1ctr = 0;
        while (spawn1) {
            // as the spawn counter increments we spawn more powerful enemies
            // imps are summoned in all other rounds
            if (spawn1ctr % 6 == 1) {
                SpawnSpotFacing("HellKnight",tid1);
            } else if (spawn1ctr % 9 == 1) {
                SpawnSpotFacing("Cacodemon",tid1);
            } else if (spawn1ctr % 12 == 1) {
                SpawnSpotFacing("BaronOfHell",tid1);
            } else {
                SpawnSpotFacing("DoomImp",tid1);
            }
            // spawn an effect with the enemy
            SpawnSpot("TeleportFog", tid1);
            Delay(90);
            spawn1 = ++spawn1Ctr < spawn1Max;
        }
        // End of spawning, release key
        Print(s:"You feel the madness begin to subside.");
        Delay(110);
        // lower the Red Key pedestal
        Floor_LowerByValue(rkid, 8, 160);

        spawnRoomInit = true;
    }
}
This script will begin a timer that runs on a delay and every period will summon imps. On rounds 6, 9 and 12 (which each occur twice) we summon Hell Knights, Cacodemons and Barons. Each of these enemies use ranged attacks giving the platforming element more danger to dodge.
Some other things this script shows:
- We have the Red Key on an elevated platform that is unreachable until lowered after the event is complete
- We use the
Printcommand to display text to the user - We can use one tag ID to make effects occur in multiple locations
If we do happen to fall into the room below we can return by stepping into any spawner down below. This uses the same teleport method we explored in The Hub.
Once the Red KeyCard is taken and we teleport back to the top we can then open the door and hit our switch lowering our elevator once again. And with the Red Keycard in hand we can venture into The Courtyard for our first boss battle.
The Courtyard: Skys, Terrain and Rockets
The Courtyard introduces some newer elements not yet explored including larger enemies, wiring a switch to a remote exit door and skyboxes. The difficulty ramps up in this area fighting two Arachnotron with the assistance of a rocket launcher. It is the only outdoor area of the level.
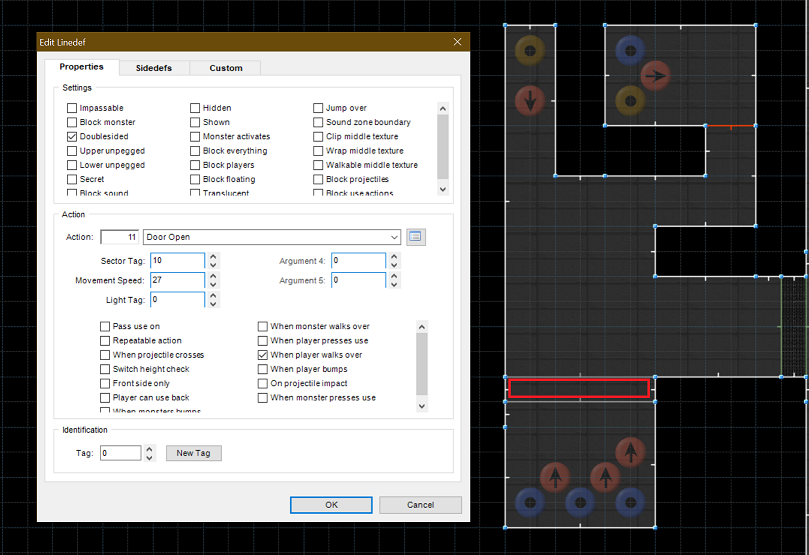
Leading into the Courtyard first however we need to deal with the tunnel entrance before it. In this tunnel we have a few conspicuous doors that release pinkies and soldiers. And hidden behind them are the secret area with the Chainsaw. We also have more breakable glass surrounding a guard.
In this animation you can see us crossing the invisible boundary causing the doors to open and if you look closer you can see my first shot taking out the guard stationed behind the glass at the end of the tunnel. This uses the same script as described earlier since it was a reusable function. You can view an image of the editor panel for the trap line.
Skyboxes
Unlike normal ceiling textures the Skybox texture is a projection into the distance. DOOM itself has more than one skybox but within the flat selector for the ceiling texture only F_SKY1 is selectable. These flats are unique in that they produce a sky and not a flat texture.
There is a longer process to making your own skybox which includes editing values in the primary IWAD for the game (which is not something Doom Builder does, if you need to try out Slade). But from what I can reason the sky that is generated is actually based on the map name and not based on the texture. So you cannot choose which sky to place on the level it is populated for you based on the map name and matches the overarching campaign background. So since we are in MAP01 of DOOM II we are using the F_SKY1 in a rocky earthen terrain after returning from hell in DOOM.
Within the courtyard we find a small structure with a timer door on it that opens very slowly. This is intended to ensure the player cannot speed through the area but must defend against the enemies while the door lowers.
Within the small structure is a switch linked to the main exit of the game which I think is a good time to highlight.
The Exit Tunnel: More Scripting and Printing
From the Hub on one corner is a larger tunnel with three large steel doors blocking the exit. These must be unlocked in succession from remote locations being the three boss chambers locked behind the three doors. Wiring up this tunnel was fun and I wanted the player to be able to assess this information from an in-game terminal nearby.
These three doors are wired to three special switches in the three boss rooms. Each time a switch is hit it executes this script:
int mainsActivated = 0;

// Level exit gate
script 9 (void)
{
    elog("main activated");
    Print(s:"You hear a large, distant door open");
    // On activate main gate switch
    int gate1sectorId = 53;
    int gate2sectorId = 54;
    int gate3sectorId = 55;
    mainsActivated++;
    if (mainsActivated == 1) {
        Ceiling_RaiseToNearest(gate1sectorId, 3);
    } else if (mainsActivated == 2) {
        Ceiling_RaiseToNearest(gate2sectorId, 3);
    } else if (mainsActivated == 3) {
        Ceiling_RaiseToNearest(gate3sectorId, 3);
    }
}
We can simply wire the same script to each button and regardless of the order they are activated in, our doors will open sequentially from closest to furthest so the player can see their progress. We also print a message to them indicating the door is opening in the hallways. Additionally the player can check the terminal at the tunnel entrance to see their progress overall which is completed with this script:
// Exit door information
script 13 (void)
{
    Print(s:"These large doors seem to lead further into the facility");
    Delay(90);
    Print(s:"The computer states:");
    Delay(90);
    Print(s:"> Security system online");
    Delay(90);
    Print(s:"> ", d:(3 - mainsActivated), s:" of 3 emergency doors engaged");
    Delay(90);
    Print(s:"> Remote overrides required to proceed");
}
Now that we have gone through our first gateway system of the HEXADEATHIMAL map, lets explore the remaining four rooms.
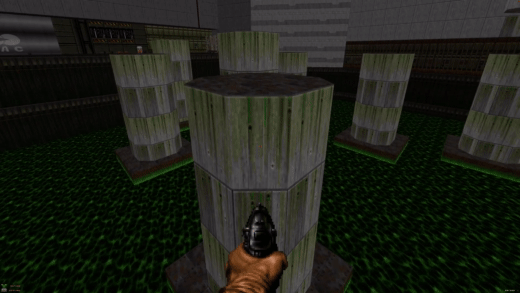
The Poison Pistons: Poisoned Floors and Piston Scripting
The Poison Pistons, also called the Pump Room, was one of the first larger areas that I worked on. I had a vision for utilizing the moving floors and ceilings to produce a series of moving platforms and crushers that would challenge platforming skills of players. Again, like the Blood Baths I think it got a little too large and involved and punishing to complete so I did add some stairs upward as a recovery point mid-room. But this room let us explore how to make floor harmful and also some more scripting for making the pistons work.
Floor Specials
We can texture floors to a variety of things but their effects on the player can change the game atmosphere drastically. Most specifically lets look at the poison effect of the floor.
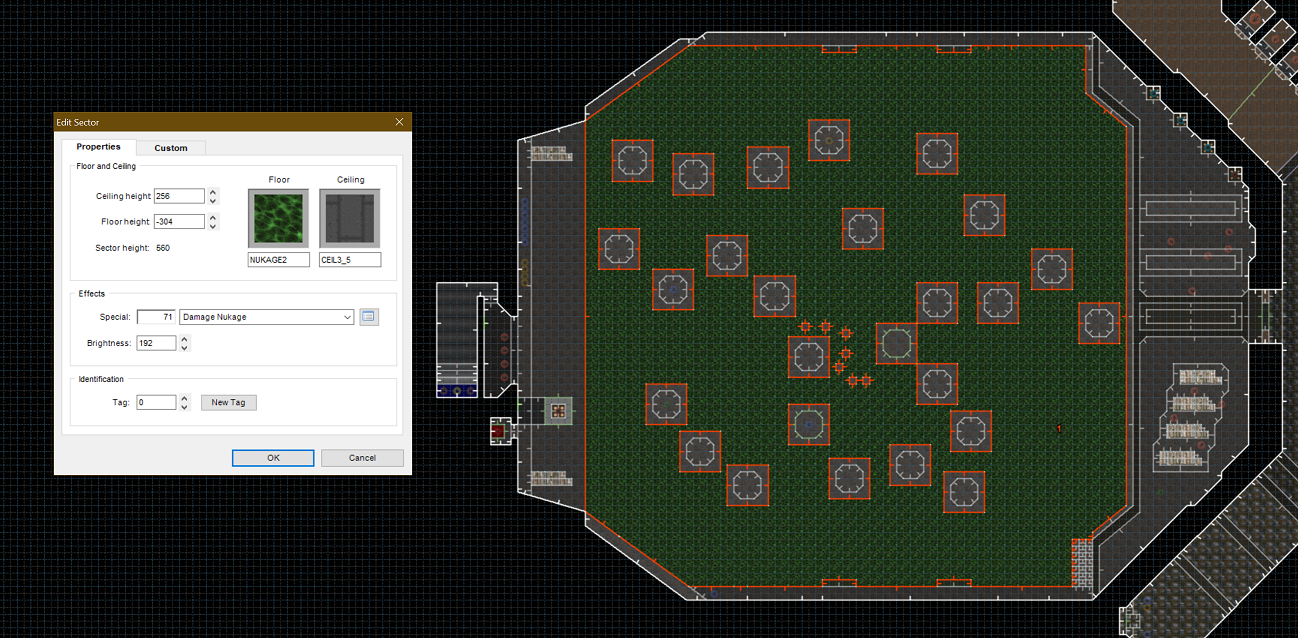
Much like the lighting style of the Shadow Maze secret we use a Sector Special called Damage Nukage that creates the poison effect on the player. We choose to combine it with the NUKAGE2 texture flat to give the effect desired. But there are a variety of effects we can apply to floors and will be later on during the level. These include:
- Damage Hellslime
- Healing Factor
- Instant Death
- Wind Movements
Similarly to before we could combine the flags to make combinations as well if needed.
Pump Room Scripting
One thing about DOOM is that any elevation changes that run on an interval run at a fixed rate. I wanted to incorporate a movement less mechanical and more natural using a SIN wave for example. Fortunately I was able to do so with some "waggle" methods provided in the ACS language and thus I set a series of pistons on differnt intervals and rates to produce the variation we see in the room overall.
But unlike other scripts that triggered on player interaction with the environment I needed this to be triggered on level start. We can use one of the Special script types provided by the language to trigger events based on the level loading. For this level I chose the ENTER script which runs on player entering the level. This however would likely cause the script to run several times for multiplayer sessions, one per player and I should have used the OPEN keyword. Regardless the pump rooom operations were as follows:
script 1 ENTER
{
    ACS_Execute(2, 0, 0, 0, 0); // Pump room
}

bool pumpRoomInit = false;

script 2 (void)
{
    if (!pumpRoomInit) {
        elog("starting pump room");
        // Pump room initiate
        Floor_Waggle(1, 350, 50, 32, 0);
        Ceiling_Waggle(1, 100, 50, 80, 0);

        //Floor_Waggle(2, 250, 90, 32, 0);
        Ceiling_Waggle(2, 150, 50, 30, 0);

        Floor_Waggle(3, 200, 30, 32, 0);
        Ceiling_Waggle(3, 100, 30, 80, 0);

        Ceiling_CrushAndRaise(4, 20, 5);
        Ceiling_CrushAndRaise(5, 30, 5);

        pumpRoomInit = true;
    }
}
Once we make it across the plaforming sections we are able to grab the Blue Keycard and find one more secret area. This secret area is hidden behind a door that cannot be opened. Nearby is a terminal that does not react to the player touch and must be shot in order to trigger the secret area.
With the Blue Keycard in hand we can activate a return teleport and move into the next boss area.
The Dungeons: Scripted Traps and Decor
I think the style and design of this area was very well polished and I spent a considerable amount of time on the cells and lighting of the interior room. I wanted to explore that medieval style you can get in the game and I think in isolation it turned out great. However, overall its a bit out place with the rest of the facility. Nevertheless I want to highlight a few interesting areas.
The tunnel entrance is a series of cells with victims and imps trapped inside. Imps can actually fire through the bars because they are Impassable but do not block projectiles. They are also positioned in a way to make them harder to notice and can catch you off guard.

Scripted Cell Trap
Alone at the end of the tunnel stands one, curious open cell.
Stepping into this cell will trigger another script that executes as a unique trap. I could have used a traditional door that closes vertically to wire the trap for the player to escape but I wanted to make it close like a door on a hinge and also to open after a time. Additionally the event needed to spawn a Cacodemon to punish the player.
A little overkill this trap I feel is cool, but I feel like it starts to break out of the normal expectations of a DOOM level. I left it in because it was effective. Here is the scripted portion:
// Cell trap!
script 11 (int closedLineId, int openLineId, int teleportId)
{
    elog("cell trap");
    Print(s:"The cell door slams shut behind you!");
    // When I cross the threshold, close and block and set midbars texture
    SetLineTexture(closedLineId, SIDE_FRONT, TEXTURE_MIDDLE, "MIDBARS1");
    SetLineTexture(closedLineId, SIDE_BACK, TEXTURE_MIDDLE, "MIDBARS1");
    SetLineBlocking(closedLineId, ON);
    // hide open line
    SetLineTexture(openLineId, SIDE_FRONT, TEXTURE_MIDDLE, "-");
    SetLineTexture(openLineId, SIDE_BACK, TEXTURE_MIDDLE, "-");
    SetLineBlocking(openLineId, OFF);

    // Delay and spawn enemy to deal with
    SpawnSpotFacing("Cacodemon", teleportId);
    SpawnSpot("TeleportFog", teleportId);
    Delay(250);
    Print(s:"The cell door creaks open");

    // Open the door again
    SetLineTexture(closedLineId, SIDE_FRONT, TEXTURE_MIDDLE, "-");
    SetLineTexture(closedLineId, SIDE_BACK, TEXTURE_MIDDLE, "-");
    SetLineBlocking(closedLineId, OFF);
    // hide open line
    SetLineTexture(openLineId, SIDE_FRONT, TEXTURE_MIDDLE, "MIDBARS1");
    SetLineTexture(openLineId, SIDE_BACK, TEXTURE_MIDDLE, "MIDBARS1");
    SetLineBlocking(openLineId, ON);
}
What is interesting about this script is that we are not moving anything. In DOOM horizontal movement of terrain is forbidden because the BSP is a fixed set of NODE data precalculated before play. So what we are doing here is hiding one texture of a LineDef and revealing the other dynamically as well as setting the blocking element of the LineDef.
Boss Room and Archvile Summons
For the boss room itself I wanted to create a challenge and the Archvile enemy type was always a difficult one to deal with for players. I spent a lot of time working on the decor and lighting of the room that surrounded a large central pillar. The pillar obscurs the enemy on entering as well as provides line-of-sight cover during the fight. The Archvile has the ability to reincarnate enemies so a couple of pinkies added some craze to the mix.
Here is a closer look at the fireplace decor in the room. I spent a good chunk of time making it work by carving out light Sectors and creating the recess. I used the flaming barrel sprites to create the fire effect of the fire.
This room is also home to a secret hidden behind a painting that must be shot to reveal The BFG.
With the boss down another exit switch is found in this room that triggers the script already explained before. With two switches complete only one more switch remains and takes us to my favorite part of this map.
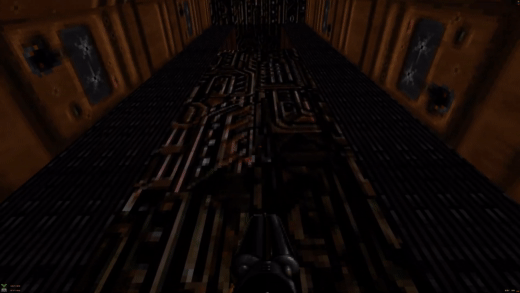
The Flooded Tunnels: Forces, Water, and Gates
The Flooded Tunnels is where I feel like the best elements of this map shine. I took a different approach to designing it. Normally I would start with a room and begin carving out features and decor turning the room from something empty into something different. But for the tunnels I had a vision of an area in my mind that I went with first. I focused on that mental image of a place that would invoke anxiety and wonder around the labyrinthian layout. I wanted peeks into other parts other tunnels to arouse curiosity. This approach worked much better.
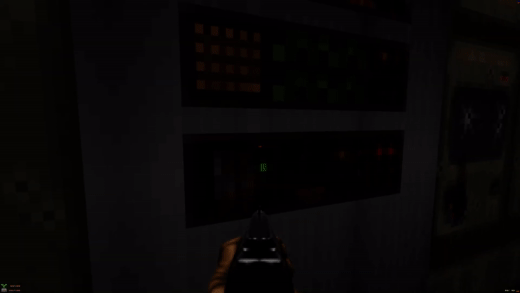
The tunnels themself have a primary objective of finding four switches to activate four systems. Each system actually lights up as you hit the switches showing you progress along the way. Here is an image of the control room with one system activated:
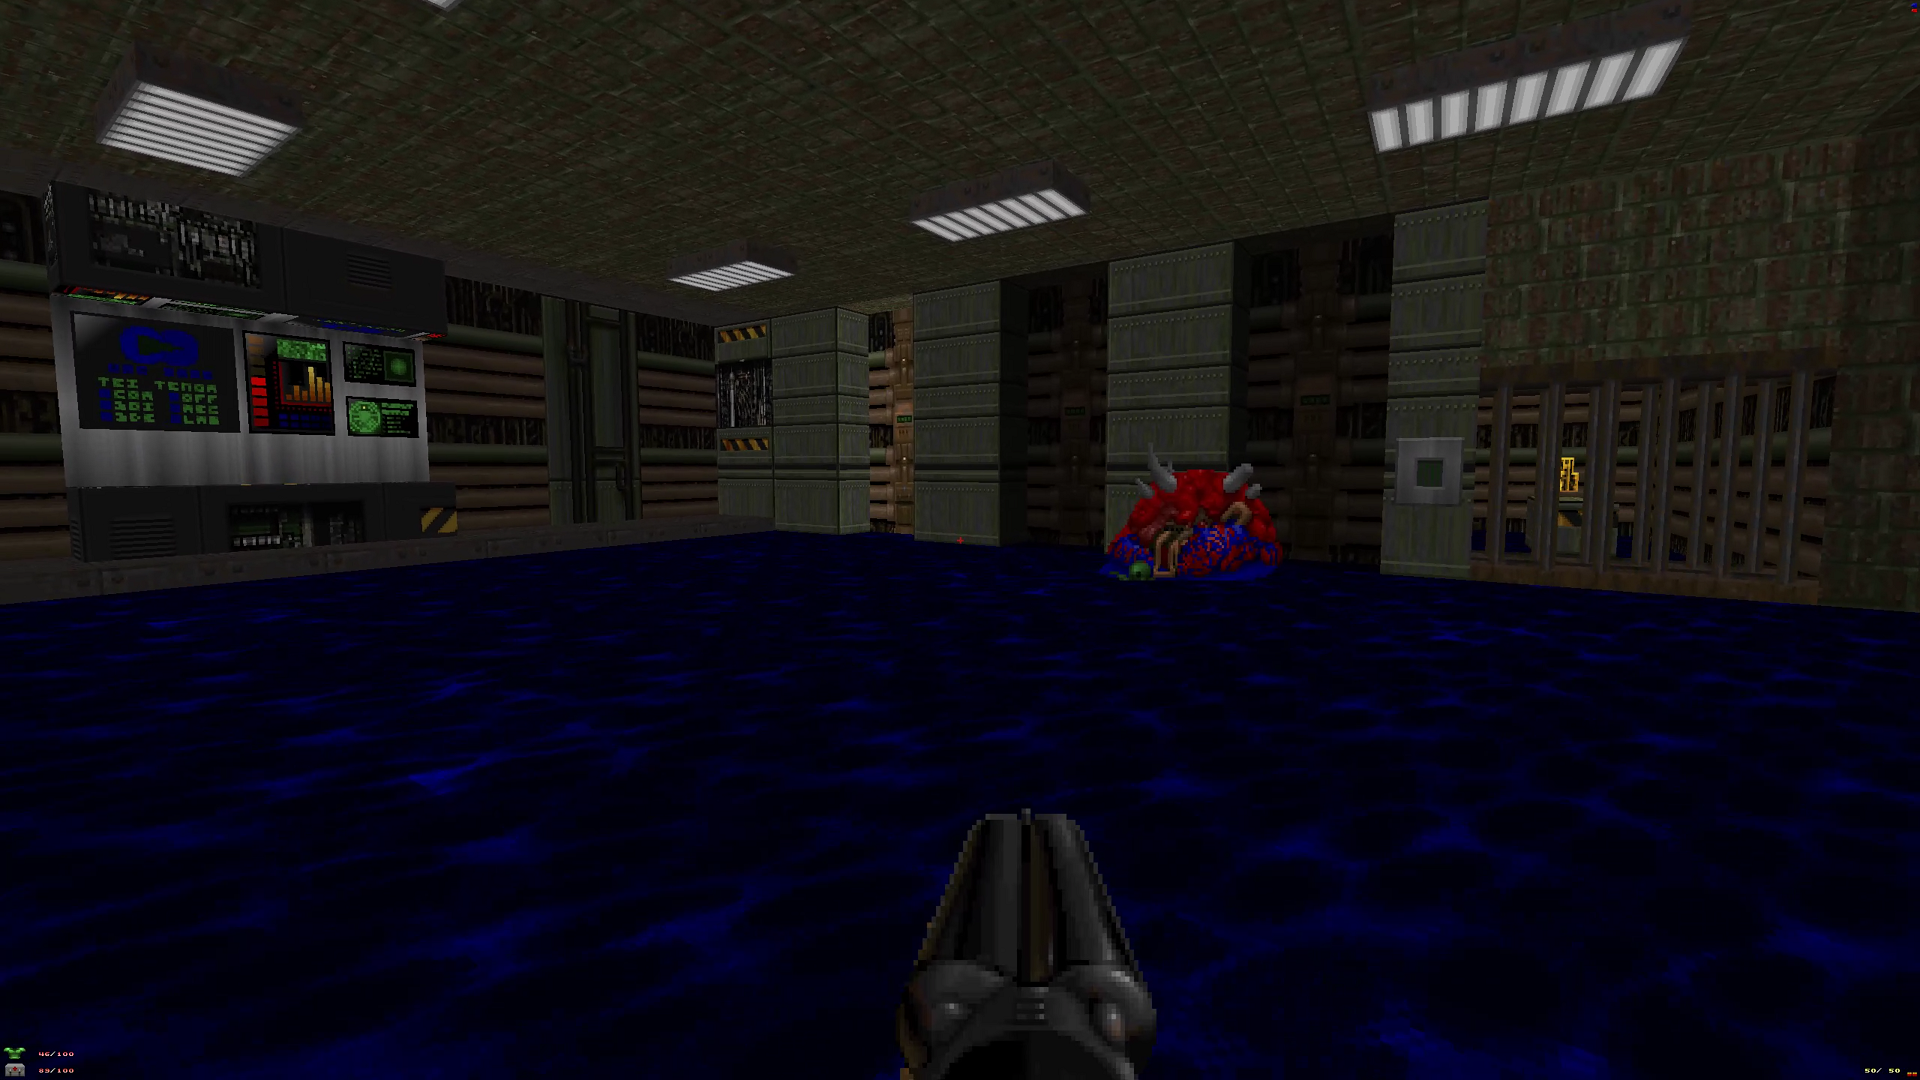
This strobing effect makes for an excellent element of the area
I wanted to add a series of pits and falling areas that you have to navigate and so I included a traversal room that had wind effects on the floor Sectors. This was a great area that lended itself to the risk-reward element by letting the player return across the same narrow stretches to get the nightvision to assist with the tunnels beyond.
To facilitate this, similarly to then nukage floor in the piston chamber I used the Wind * Medium forces on different Sectors to create a push and pull effect as you traversed the caverns. As well, for the floors within the deep pits of the level we used Instant Death special effect so as to kill the player on fall.
Scripting
The ACS Scripting for the area is the most complex overall as it involves wiring specific switches to pump system lights and gating the switch to the Yellow Keycard until all of the terminals have been activated. The scripts are as follows:
// global vars
bool sewerOnline = false;
bool sewerCount = 0;
Within the control room if the player hits the computer we can execute this script to determine the status overall and print it to the user:
// Sewer terminal
script 5 (void)
{
    AmbientSound("misc/chat2",127);
    if (sewerOnline) {
        Print(s:"Pumps appear online and functional");
    } else {
        Print(s:"The engineering system bleets:");
        Delay(90);
        Print(s:"> The pump systems are offline");
        Delay(90);
        Print(s:"> ", d:sewerCount, s:" of 4 terminals active");
    }
}
As we navigate the tunnels and activate the switches we can then trigger the system unlocks with the script wired to the terminal switches:
// Sewer pump terminal activate
script 6 (void)
{
    Print(s:"Terminal activated");
    sewerCount++;
    sewerOnline = sewerCount >= 4;
    onTermActivate();
}

function void onTermActivate(void)
{
    // depending on which terminal was hit lets light up a pump
    int t1 = 38;
    int t2 = 39;
    int t3 = 40;
    int t4 = 41;
    if (sewerCount == 1) {
        Light_ChangeToValue (t1, 192);
    } else if(sewerCount == 2) {
        Light_ChangeToValue (t2, 192);
    } else if(sewerCount == 3) {
        Light_ChangeToValue (t3, 192);
    } else if(sewerCount == 4) {
        Light_ChangeToValue (t4, 192);
    }
}
I don't recall why I broke the second portion into its own function but by doing so we can demonstrate that part of the ACS language at work. Whenever we hit a switch we increment our count and based on the number of activations change the light levels of the Sectors containing the pump systems.
Once all four have been switched our sewerOnline flag gets set and we can unlock the keycard gate:
// Sewer key gate
script 7 (void)
{
    int gateLineId = 43;
    int gateSectorId = 42;
    // Attempt sewer card open
    if (!sewerOnline) {
        Print(s:"It won't open");
    } else {
        // Open the sewer gate
        Ceiling_RaiseByValue(gateSectorId, 16, 56);
        SetLineBlocking(gateLineId, OFF);
    }
}
We added this custom script to the gate switch since the built in DOOM functionality did not support a locking mechanism attached to a switch. When it is all wired in place we have a cool labyrinthian experience.
The Apex Room
The last boss room has less tricks or new elements but does incorporate a very interesting elevator. I wanted it to feel like you were ascending into a mechanical brain of the station and utilized some of the stairstepping techniques we covered in The Hub. I used triangular shapes to make it more unique and the orange metalic textures added a bizarre futuristic style. I will let these animations showcase the style of the elevator and room.
Here we can see the floor raising in sequence:
And here the ascension of the elevator:
And finally at the apex we enter into the control room:
Once we have defeated the Revenant and Imps of the room and ascended and hit our last switch the exit of the game finally opens.
The Escape
I have already detailed the scripting and layout of this final tunnel area so this concludes the deep dive into the Anatomy of a Doom Level. I hope you have enjoyed this experience and information as I am sure I will enjoy reviewing the work that went into this game overall.
The DOOM engine has stood the test of time, now approaching 30 years old and a strong community of modders, speedrunners and developers.